> ## Documentation Index
> Fetch the complete documentation index at: https://docs.rulebase.co/llms.txt
> Use this file to discover all available pages before exploring further.
# Find tickets and evaluations
> Get to the reviews waiting on you, move between the ticket list and the evaluation list, and save the filtered views you open every morning.
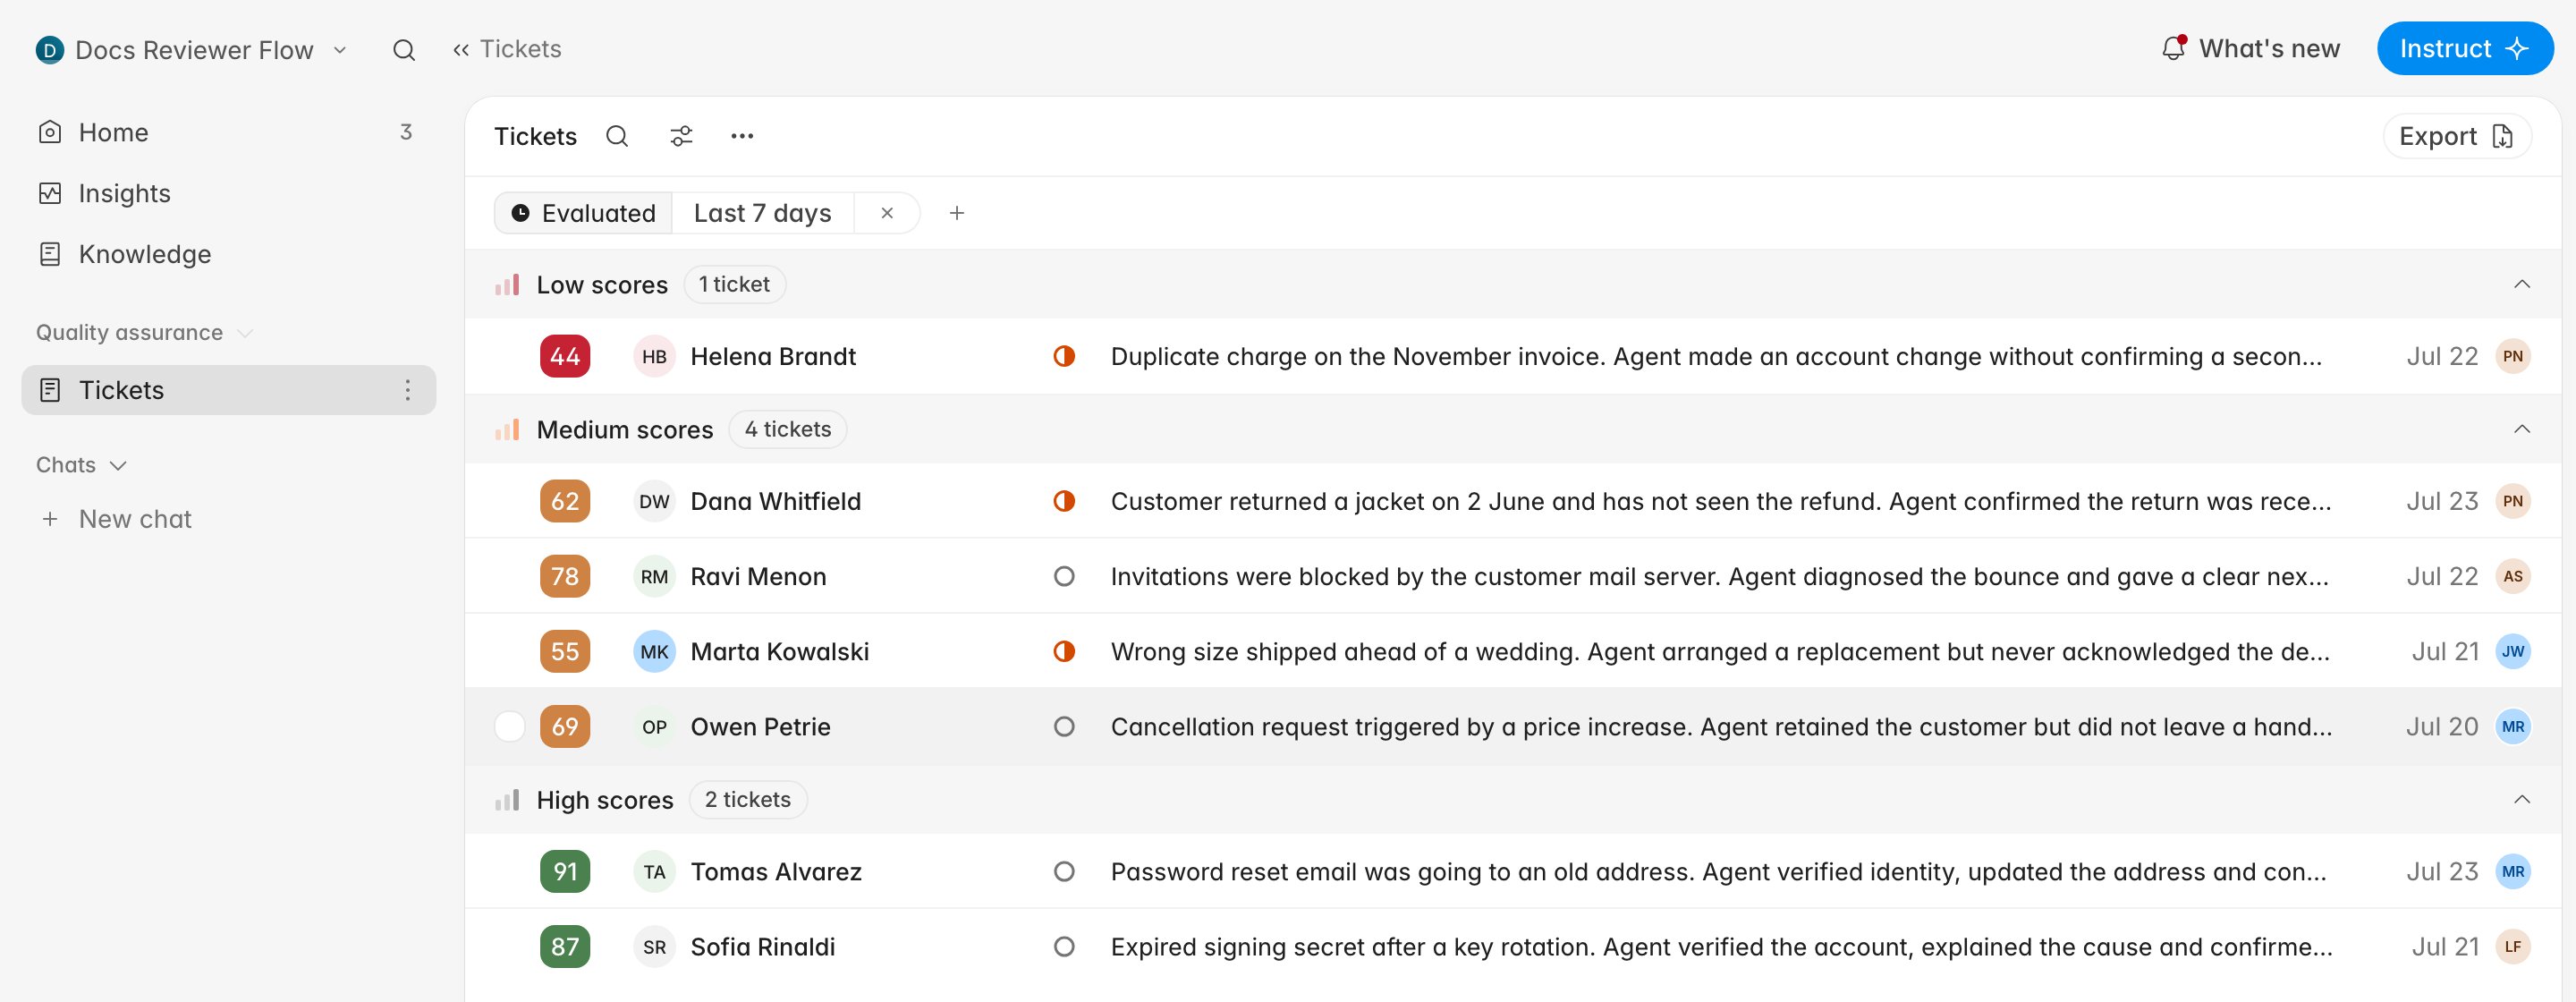
Rulebase keeps QA results in two lists: **Tickets** is one row per
conversation, **Evaluations** is one row per agent score.
 ## Before you start
* Both lists show completed evaluations, so an organization that has not scored
anything yet sees empty sections. [How AI QA
works](/guides/concepts/how-ai-qa-works) covers what has to be true before a
ticket gets a score.
* Every organization starts with a **Tickets** view in the sidebar under **Quality
assurance**. An **Evaluations** view is one you add yourself; see
below.
* Nothing on this page changes a score, so it is safe to click around while you
learn the filters.
## Start with what is assigned to you
Before you go looking through a list, check whether the work has already been
handed to you. When a routing rule or a colleague assigns you a ticket, it lands on
**Home**, and the number beside **Home** in the sidebar is the count of tasks
assigned to you.
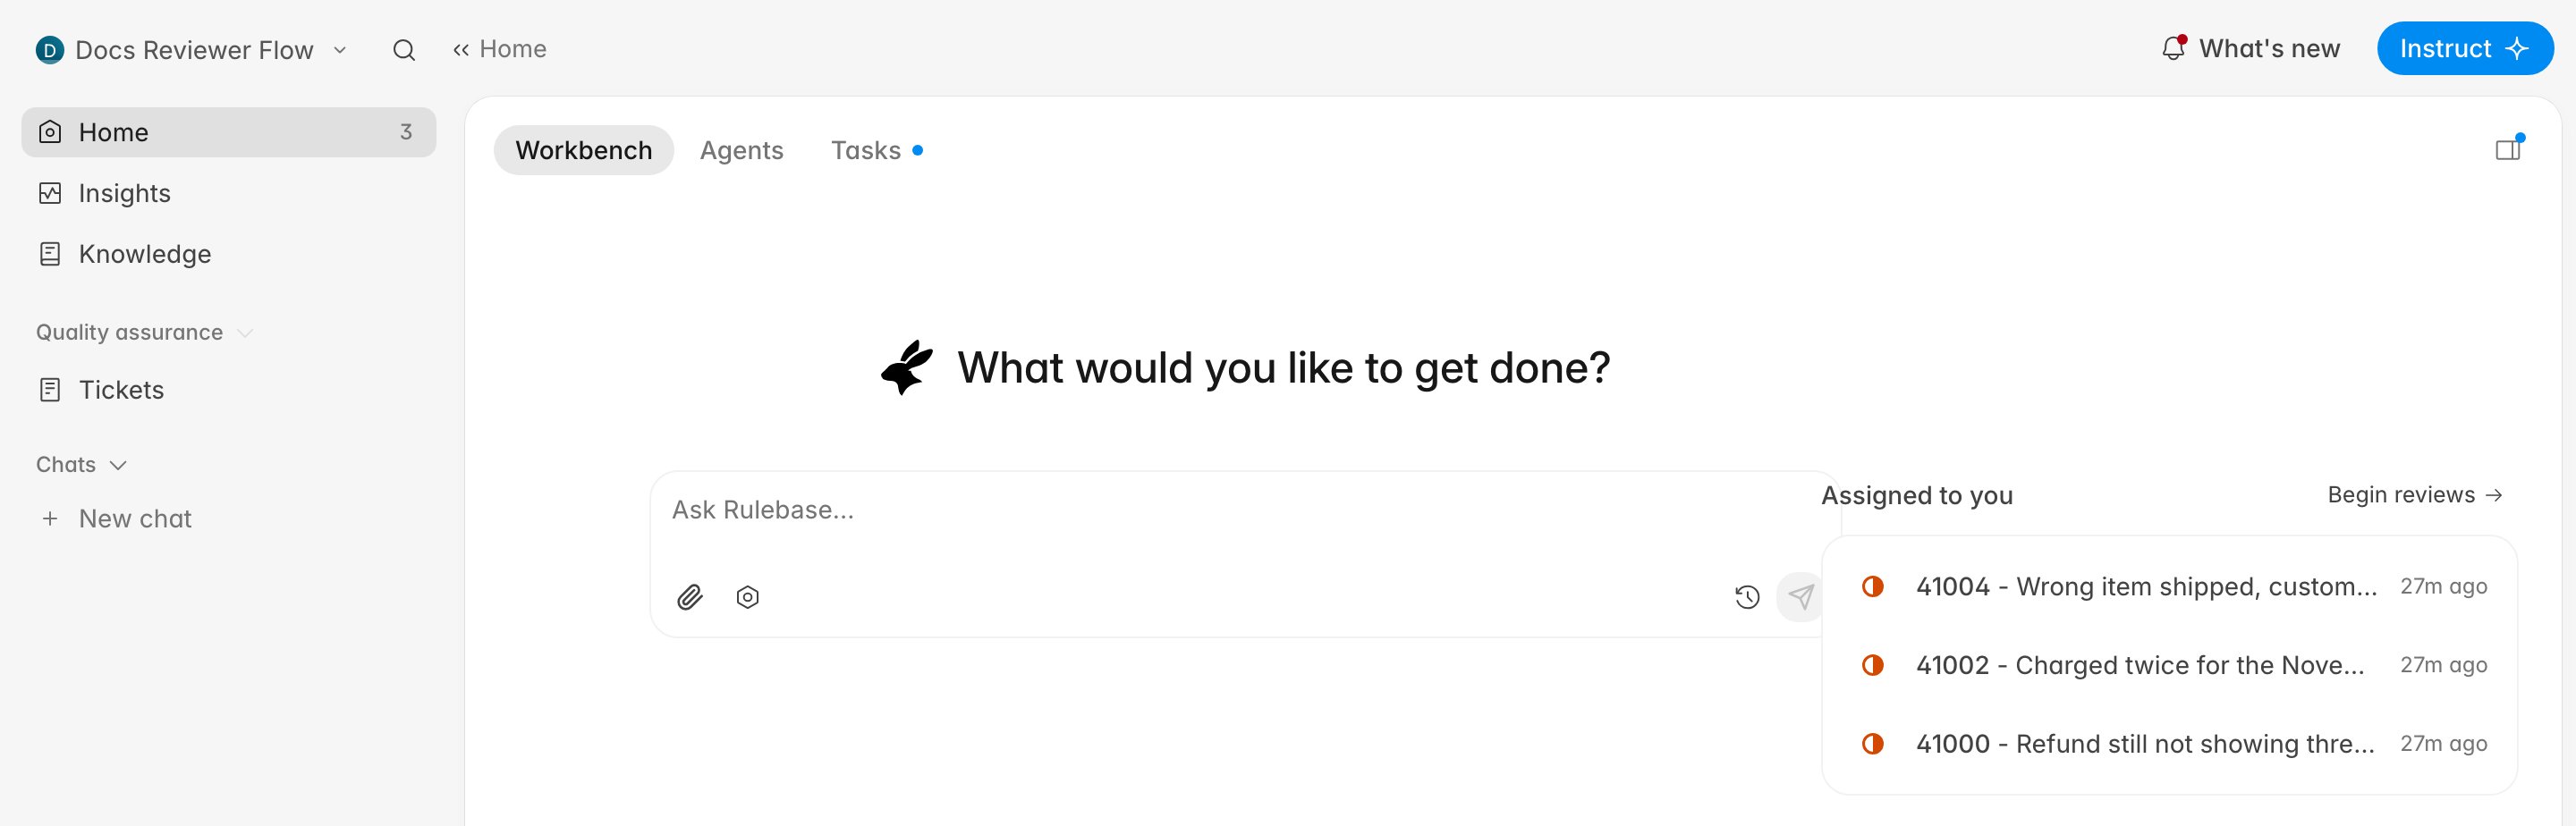
The **Workbench** tab shows an **Assigned to you** card next to the composer, with
any calibration batches first and your assigned tickets below them. Click a row to
open it, or click **Begin reviews** to work the whole set as a queue rather than
one at a time.
## Before you start
* Both lists show completed evaluations, so an organization that has not scored
anything yet sees empty sections. [How AI QA
works](/guides/concepts/how-ai-qa-works) covers what has to be true before a
ticket gets a score.
* Every organization starts with a **Tickets** view in the sidebar under **Quality
assurance**. An **Evaluations** view is one you add yourself; see
below.
* Nothing on this page changes a score, so it is safe to click around while you
learn the filters.
## Start with what is assigned to you
Before you go looking through a list, check whether the work has already been
handed to you. When a routing rule or a colleague assigns you a ticket, it lands on
**Home**, and the number beside **Home** in the sidebar is the count of tasks
assigned to you.
The **Workbench** tab shows an **Assigned to you** card next to the composer, with
any calibration batches first and your assigned tickets below them. Click a row to
open it, or click **Begin reviews** to work the whole set as a queue rather than
one at a time.
 The count next to **Home** also includes calibration batches you have been added
to, not just individual tickets. If the number is higher than the ticket list
explains, an evaluation batch is waiting for you.
## Tickets and Evaluations answer different questions
Both lists group by score band and both show a coloured score chip. A ticket
handled by three agents produces one row in **Tickets** and three rows in
**Evaluations**.
| | Tickets | Evaluations |
| ------------------ | ----------------------------------------------------------- | ------------------------------------------------------------ |
| One row is | a ticket | one agent's score on one ticket |
| The score shown | the ticket's QA score | that agent's score |
| Default date range | evaluated in the last 7 days | evaluated in the last 30 days |
| Reach for it when | you are working a review queue conversation by conversation | you are comparing agents, or checking one evaluator's output |
| Clicking a row | opens the ticket's QA workspace | opens the same workspace with that evaluation selected |
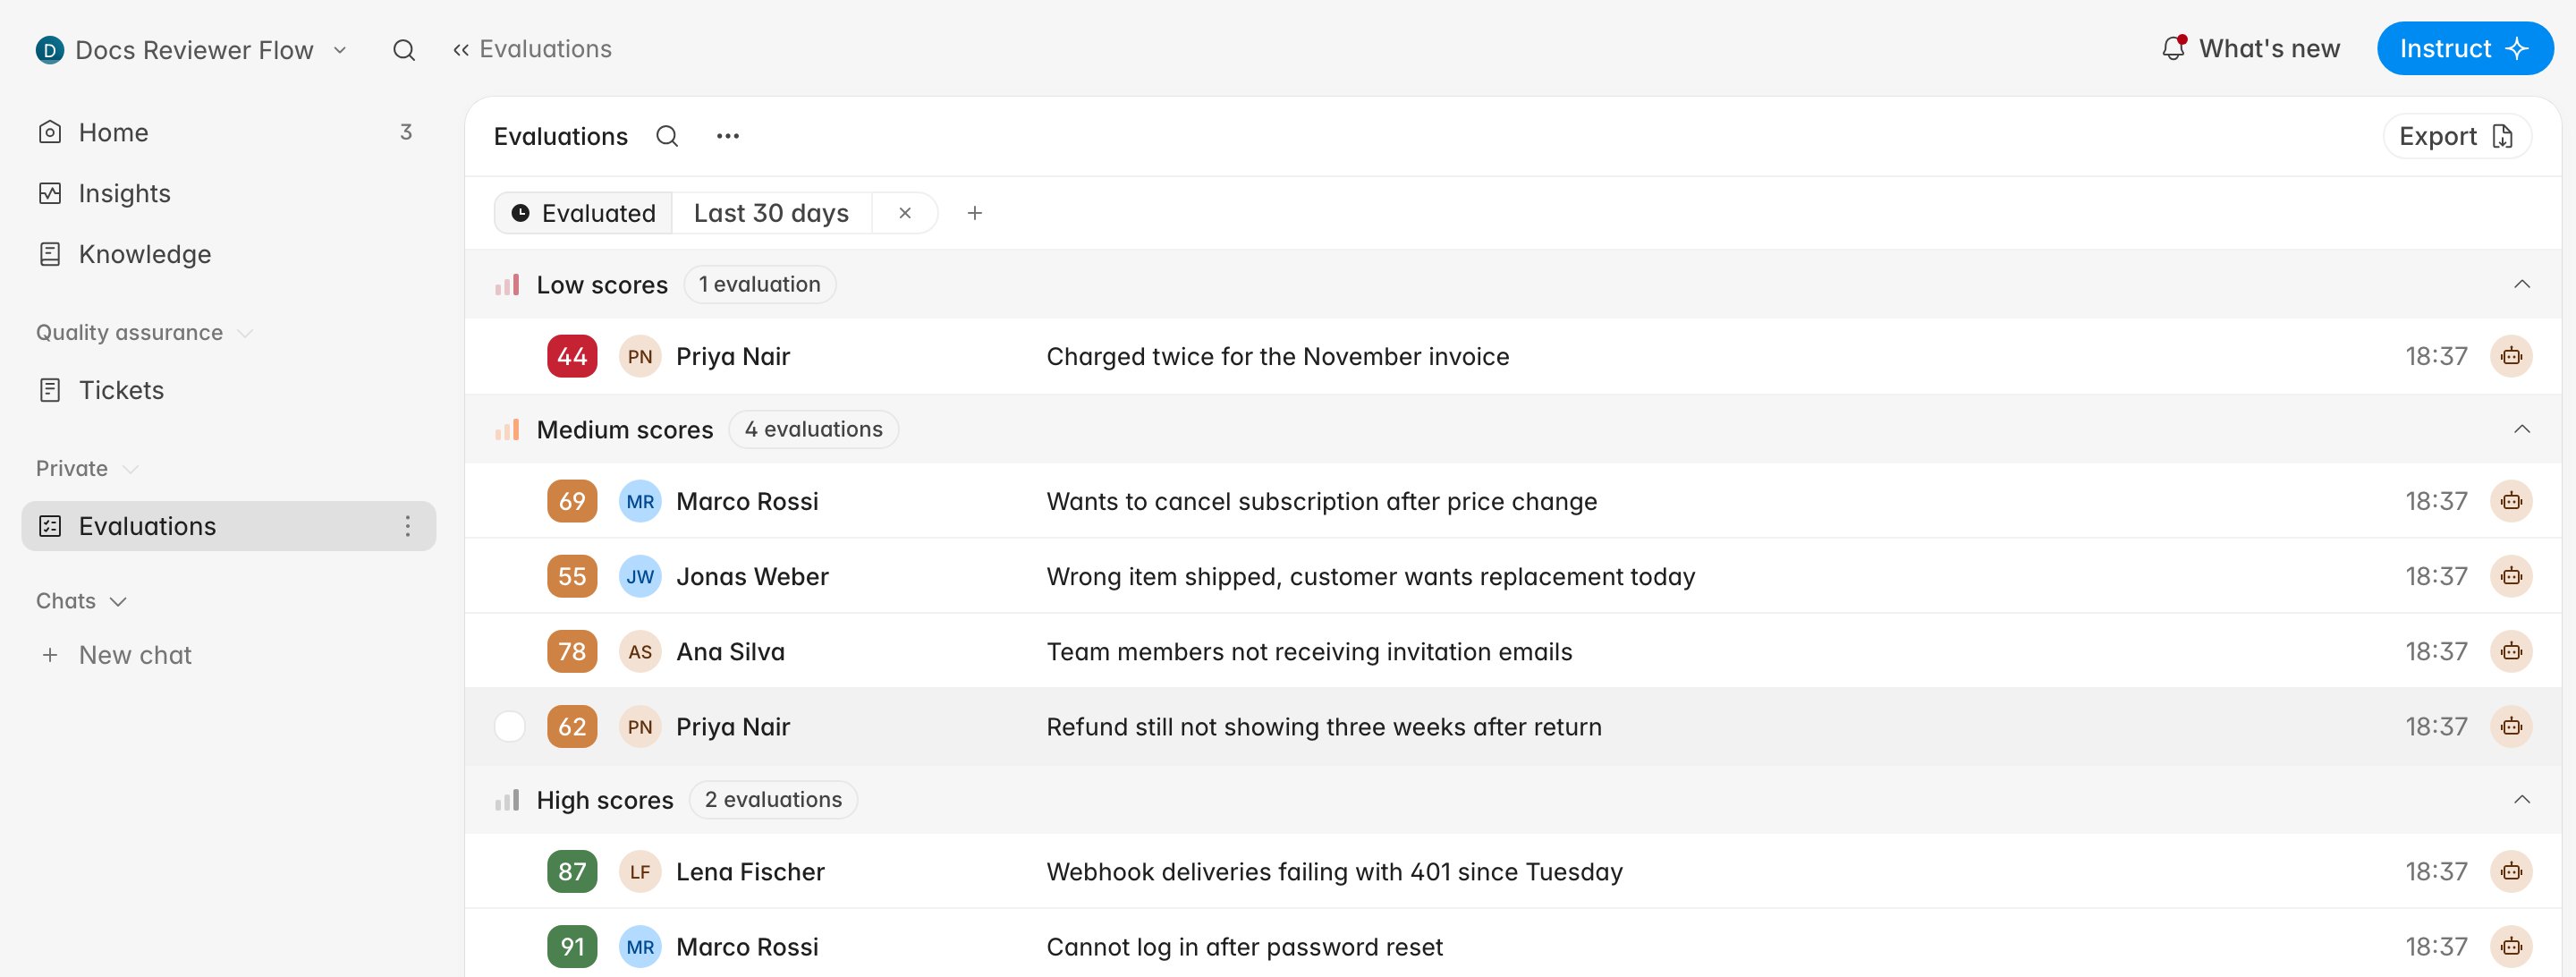
The two lists ship with different default date ranges, so neither contains the
other. A ticket scored three weeks ago is in **Evaluations** and not in
**Tickets** until you widen the date filter.
**Low scores** is the red section at the top, because a low score is the
high-risk one. Sections are ordered by how much attention the tickets need, not
by score.
## Add an Evaluations view
Views are the saved lists in your sidebar, and you add one from the section header
rather than from a settings page.
1. Hover the **Quality assurance** heading in the sidebar and click the **+**
(**New view**).
2. Pick **Evaluations** in the **New view** dialog.
3. Rulebase creates the view and opens it in edit mode with a suggested name, so
renaming it is the first thing you can do.
The count next to **Home** also includes calibration batches you have been added
to, not just individual tickets. If the number is higher than the ticket list
explains, an evaluation batch is waiting for you.
## Tickets and Evaluations answer different questions
Both lists group by score band and both show a coloured score chip. A ticket
handled by three agents produces one row in **Tickets** and three rows in
**Evaluations**.
| | Tickets | Evaluations |
| ------------------ | ----------------------------------------------------------- | ------------------------------------------------------------ |
| One row is | a ticket | one agent's score on one ticket |
| The score shown | the ticket's QA score | that agent's score |
| Default date range | evaluated in the last 7 days | evaluated in the last 30 days |
| Reach for it when | you are working a review queue conversation by conversation | you are comparing agents, or checking one evaluator's output |
| Clicking a row | opens the ticket's QA workspace | opens the same workspace with that evaluation selected |
The two lists ship with different default date ranges, so neither contains the
other. A ticket scored three weeks ago is in **Evaluations** and not in
**Tickets** until you widen the date filter.
**Low scores** is the red section at the top, because a low score is the
high-risk one. Sections are ordered by how much attention the tickets need, not
by score.
## Add an Evaluations view
Views are the saved lists in your sidebar, and you add one from the section header
rather than from a settings page.
1. Hover the **Quality assurance** heading in the sidebar and click the **+**
(**New view**).
2. Pick **Evaluations** in the **New view** dialog.
3. Rulebase creates the view and opens it in edit mode with a suggested name, so
renaming it is the first thing you can do.
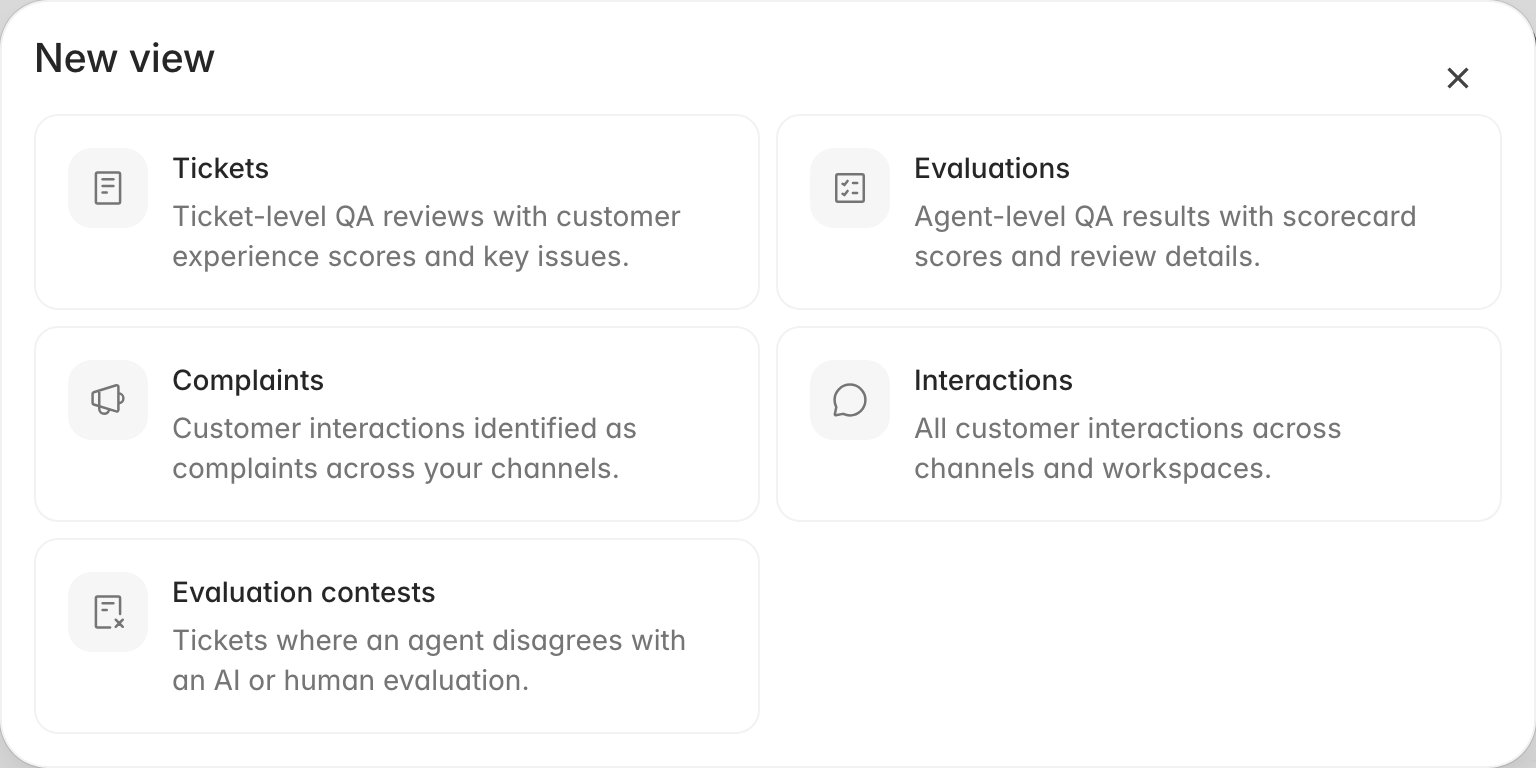 The same dialog is where the other list types come from. **Complaints** narrows to
interactions Rulebase flagged as complaints, **Interactions** drops the QA filter
and shows everything that arrived from your help desk, and **Evaluation contests**
collects the scores agents have disputed (see [Work contested
tickets](/guides/quality-assurance/work-contested-tickets)).
A **Complaints** view lists tickets, not complaint cases. The casework (one record
per complaint, with its category tags, timeline, and status) lives in Compliance
instead, and [Work a complaint case](/guides/compliance/work-a-complaint-case) is
the guide for it.
Every view is shared with your whole organization and appears under **Quality
assurance** in the sidebar. The **Options** menu (**⋯**) in the view's toolbar
holds **Edit**, **Duplicate**, and **Delete**.
The same dialog is where the other list types come from. **Complaints** narrows to
interactions Rulebase flagged as complaints, **Interactions** drops the QA filter
and shows everything that arrived from your help desk, and **Evaluation contests**
collects the scores agents have disputed (see [Work contested
tickets](/guides/quality-assurance/work-contested-tickets)).
A **Complaints** view lists tickets, not complaint cases. The casework (one record
per complaint, with its category tags, timeline, and status) lives in Compliance
instead, and [Work a complaint case](/guides/compliance/work-a-complaint-case) is
the guide for it.
Every view is shared with your whole organization and appears under **Quality
assurance** in the sidebar. The **Options** menu (**⋯**) in the view's toolbar
holds **Edit**, **Duplicate**, and **Delete**.
 ## Narrow a list without losing it
Filters live in two places on a view, and they do the same thing. The pills along
the top row show what is currently applied; the **+** at the end of that row and
the filter icon in the toolbar both open the filter menu. Add a filter and the list
updates immediately, but nothing is saved yet. Changing filters on a view is a
temporary exploration. As soon as your filters differ from the ones the view was saved with,
**Clear** and **Save** appear at the right-hand end of the pill row: **Save** makes
the change permanent, **Clear** puts the view back to its saved filters. Do neither
and the view reverts on its own the next time you open it. The **×** on an
individual pill only removes that one filter.
If a filter combination is one you want permanently and the view belongs to someone
else, duplicate it from the **⋯** menu first and change the copy.
[Filter by team, partner, brand, and
channel](/guides/quality-assurance/filter-interactions) covers what each filter
dimension selects, including the ones that only appear for certain
integrations.
## Change how the list reads
The sliders icon in the toolbar opens **Displays**, which controls two things
independent of any filter.
**Grouping** decides the section headings. On Tickets you can group by **Risk
level** (the default Low / Medium / High sections) or by **Review status**; on
Evaluations the choices are **Score level** or **Type**, where Type splits AI
reviews from manual ones. Both offer **No grouping**, which gives you one flat list
and is usually what you want once a filter has already narrowed things down.
**List options** controls what appears on each row. Turn off the ones your team
does not use and the summary text gets more room.
Display choices save to the view on their own, unlike filters. Search sits beside
them in the same toolbar and matches the ticket number, the subject, and the
summary Rulebase generated, not the message text inside the conversation. Search
for a phrase a customer used and you will usually come up empty; search for the
ticket number and you land on it immediately.
Once a list is narrowed the way you want it, **Export** in the top right sends the
same rows out as a file. [Export QA evaluation
data](/guides/quality-assurance/export-qa-evaluations) covers what the columns
contain.
## Related
* [Open a ticket's QA workspace](/guides/quality-assurance/ticket-qa-workspace)
* [Filter by team, partner, brand, and channel](/guides/quality-assurance/filter-interactions)
* [Perform a manual evaluation](/guides/quality-assurance/perform-a-manual-evaluation)
* [Rulebase glossary](/guides/concepts/glossary), for the difference between
tickets, interactions, and work items
* [Why wasn't my ticket evaluated?](/guides/troubleshooting/why-wasnt-my-ticket-evaluated),
when a ticket you expected is missing from both lists
## Narrow a list without losing it
Filters live in two places on a view, and they do the same thing. The pills along
the top row show what is currently applied; the **+** at the end of that row and
the filter icon in the toolbar both open the filter menu. Add a filter and the list
updates immediately, but nothing is saved yet. Changing filters on a view is a
temporary exploration. As soon as your filters differ from the ones the view was saved with,
**Clear** and **Save** appear at the right-hand end of the pill row: **Save** makes
the change permanent, **Clear** puts the view back to its saved filters. Do neither
and the view reverts on its own the next time you open it. The **×** on an
individual pill only removes that one filter.
If a filter combination is one you want permanently and the view belongs to someone
else, duplicate it from the **⋯** menu first and change the copy.
[Filter by team, partner, brand, and
channel](/guides/quality-assurance/filter-interactions) covers what each filter
dimension selects, including the ones that only appear for certain
integrations.
## Change how the list reads
The sliders icon in the toolbar opens **Displays**, which controls two things
independent of any filter.
**Grouping** decides the section headings. On Tickets you can group by **Risk
level** (the default Low / Medium / High sections) or by **Review status**; on
Evaluations the choices are **Score level** or **Type**, where Type splits AI
reviews from manual ones. Both offer **No grouping**, which gives you one flat list
and is usually what you want once a filter has already narrowed things down.
**List options** controls what appears on each row. Turn off the ones your team
does not use and the summary text gets more room.
Display choices save to the view on their own, unlike filters. Search sits beside
them in the same toolbar and matches the ticket number, the subject, and the
summary Rulebase generated, not the message text inside the conversation. Search
for a phrase a customer used and you will usually come up empty; search for the
ticket number and you land on it immediately.
Once a list is narrowed the way you want it, **Export** in the top right sends the
same rows out as a file. [Export QA evaluation
data](/guides/quality-assurance/export-qa-evaluations) covers what the columns
contain.
## Related
* [Open a ticket's QA workspace](/guides/quality-assurance/ticket-qa-workspace)
* [Filter by team, partner, brand, and channel](/guides/quality-assurance/filter-interactions)
* [Perform a manual evaluation](/guides/quality-assurance/perform-a-manual-evaluation)
* [Rulebase glossary](/guides/concepts/glossary), for the difference between
tickets, interactions, and work items
* [Why wasn't my ticket evaluated?](/guides/troubleshooting/why-wasnt-my-ticket-evaluated),
when a ticket you expected is missing from both lists