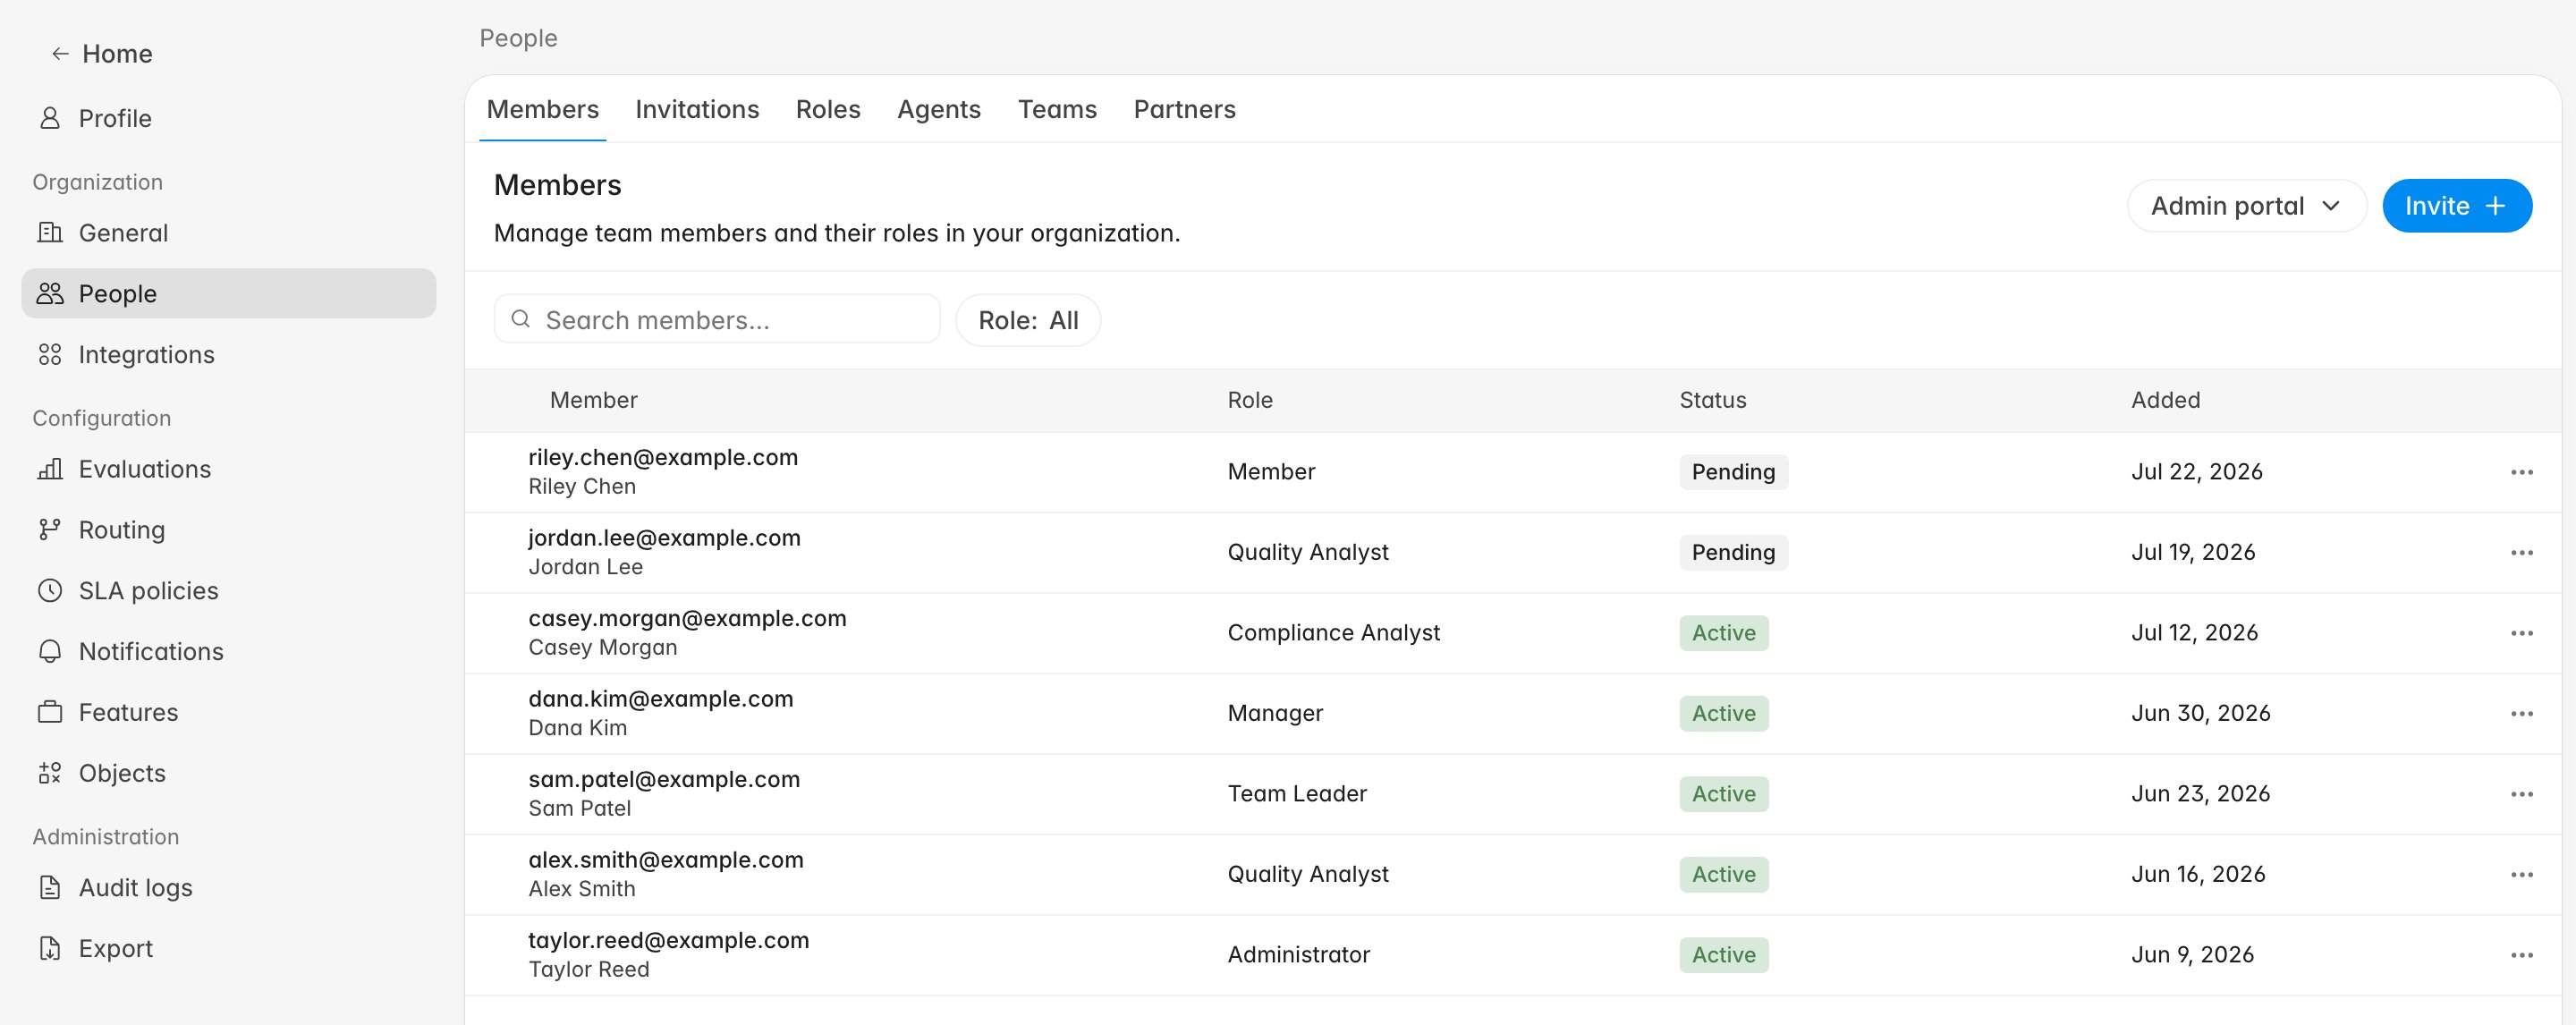
Everyone who works in Rulebase needs their own account. Inviting someone sends them an email with a link to join your organization, and the role you choose controls what they can see and do once they accept. Settings People Members page showing the Invite button, search bar, role filter, and a member table listing seven people across different roles with Active and Pending statuses

Before you start

  • You need an admin role or permission to manage invitations.
  • Have the email addresses ready. You can invite several people at once.
  • If the role you want to assign doesn’t exist yet, create it first under Settings > People > Roles. See Roles and permissions.

Send invitations

  1. Go to Settings > People > Members.
  2. Click Invite.
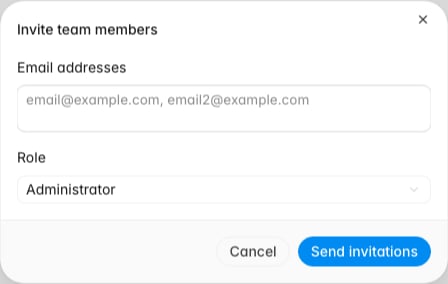
  3. In the Email addresses field, type one or more addresses separated by commas.
  4. Choose a Role from the dropdown.
  5. Click Send invitations.
Invite team members dialog with email addresses field and role dropdown Rulebase sends each address an invitation email. Until the recipient accepts, they appear as Pending on the Invitations tab.

Scoping access for non-admin roles

If your organization has partners configured, the invite dialog shows an additional Scope field. Scoping narrows what data the invited person can reach:
  • Entire organization — access to data across the whole organization. This is the default.
  • Specific groups — access limited to the groups you select.
  • Specific teams — access limited to the teams you select.
  • Specific partners — access limited to the partners you select.
Two roles ignore scope entirely. Administrators always have access across the entire organization, and agents can only ever access their own tickets and activity. Selecting either role disables the scope picker.
Everyone in a single invite batch receives the same role and the same scope. When onboarding a mixed group, send one batch per role rather than one batch for everyone.

Track and revoke pending invitations

The Invitations tab lists every invitation with its Email, Role, Status, and the date it was Invited. Organizations with partners configured also see a Scope column showing where that person’s access will land. While an invitation is still Pending, its row has an overflow menu with a Revoke option. Revoking marks the invitation as Revoked and the link stops working. Once someone has accepted, the menu disappears; manage them from the Members tab instead, where you can change their role or remove them from the organization.

What happens after someone accepts

The recipient clicks the link in their invitation email and sets up their account. They then appear on the Members tab, and they can log in and work according to their role’s permissions right away. There’s no separate approval step on your side.