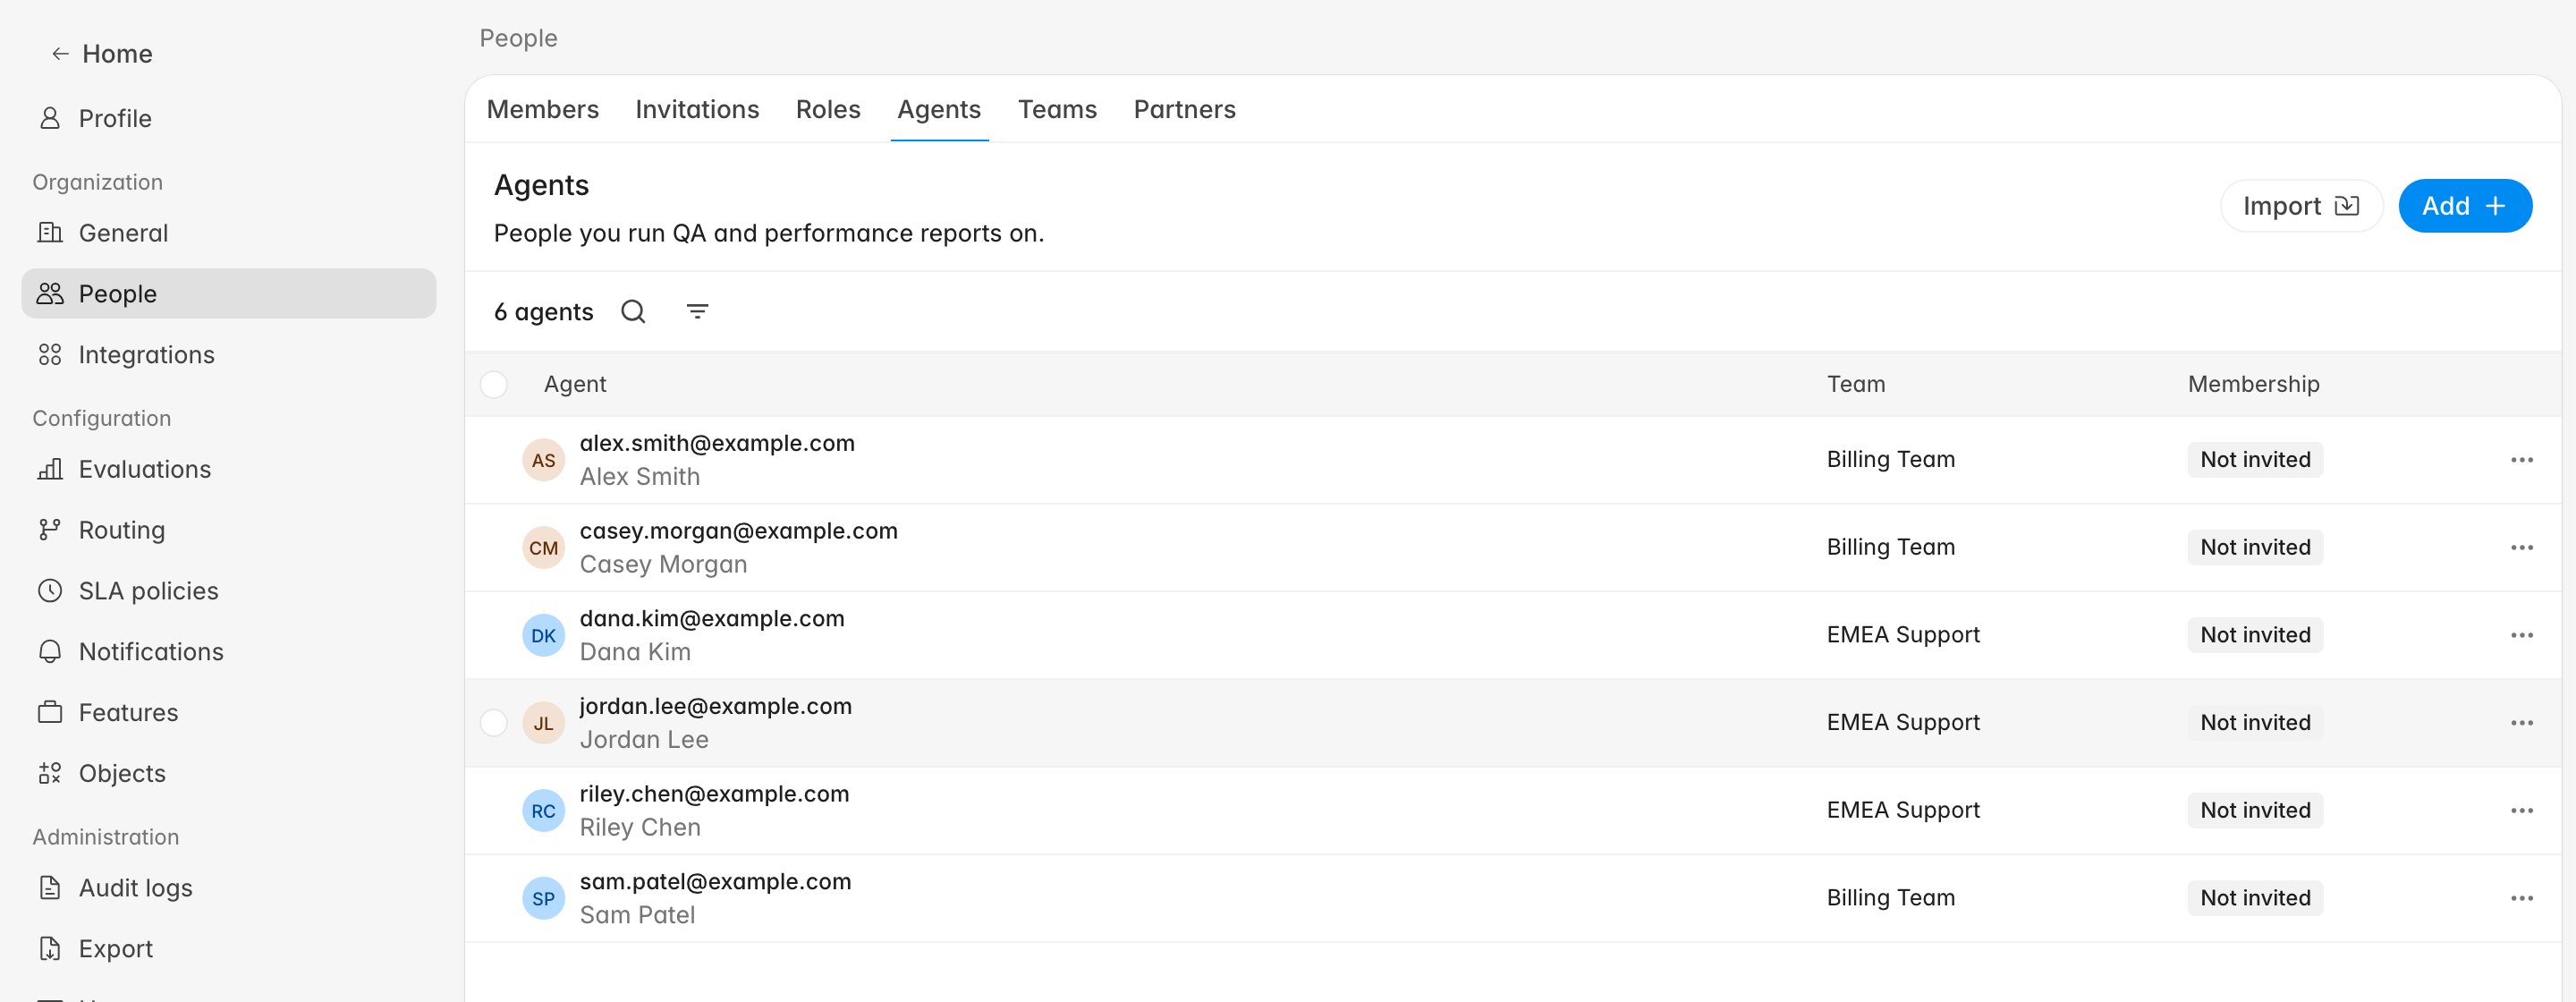
The agent roster is the list of support reps Rulebase runs QA and performance reports on. Anyone missing from it goes unevaluated; anyone left on it after they leave keeps appearing in team performance views and exports. Teams usually edit it after a hiring round, a reorg, or a QA report that returns an unfamiliar name. Settings People Agents page with the agent count, Import and Add buttons, and a table with Agent, Team, and Membership columns
Rulebase uses “agent” for two things. This page is the QA roster at Settings > People > Agents: the human support reps you evaluate. The AI agents you build live under Home > Agents, and nothing here affects them. The glossary defines both terms.

Before you start

  • Work from Settings > People > Agents. The header reads Agents, subtitle “People you run QA and performance reports on.”
  • For any roster-wide change, download the existing roster first and edit that file. It already has the right headers and the identifiers Rulebase matches on.
  • Being on the roster is not the same as having a Rulebase login. The Membership column tracks the login separately, and evaluation does not depend on it.

What the table tells you

  • Agent: email (the primary identifier) with the name underneath.
  • Team: their team, or - if none. Teams drive grouping in QA reports; an agent with no team drops out of team-level views.
  • Membership: whether they can log in. Values are Not invited, Invite pending, or Invited. Invitations are optional; a Not invited agent is still evaluated.
The agent count sits above the table. The filter icon next to it narrows by Team or Workspace (where Sales and Customer Service agents are separated).

Export the current roster

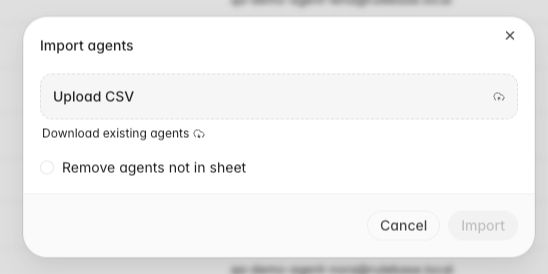
The export lives inside the import dialog.
  1. Click Import.
  2. Click Download existing agents.
Import agents dialog with the Upload CSV drop zone, Download existing agents link, and Remove agents not in sheet checkbox You get a CSV named after your organization and download date, with every current agent. Columns are Name, Email, Employee ID, and Team, plus one per custom agent field your organization defines; organizations that evaluate sales calls also get a Role column. Edit values, but leave headers alone. Rulebase matches columns by header name, and a renamed header is treated as an unrecognized custom field.

Import roster changes

An import is an upsert: Rulebase matches by email first, then employee ID, updates whoever it finds, and creates the rest. Anyone it touches lands on the active roster, so an import also brings back someone you removed earlier.
  1. Click Import.
  2. Drop your file on Upload CSV, or click it and pick the file.
  3. Select Remove agents not in sheet when this file is the complete roster. Leave it off to only add and update the rows you supply.
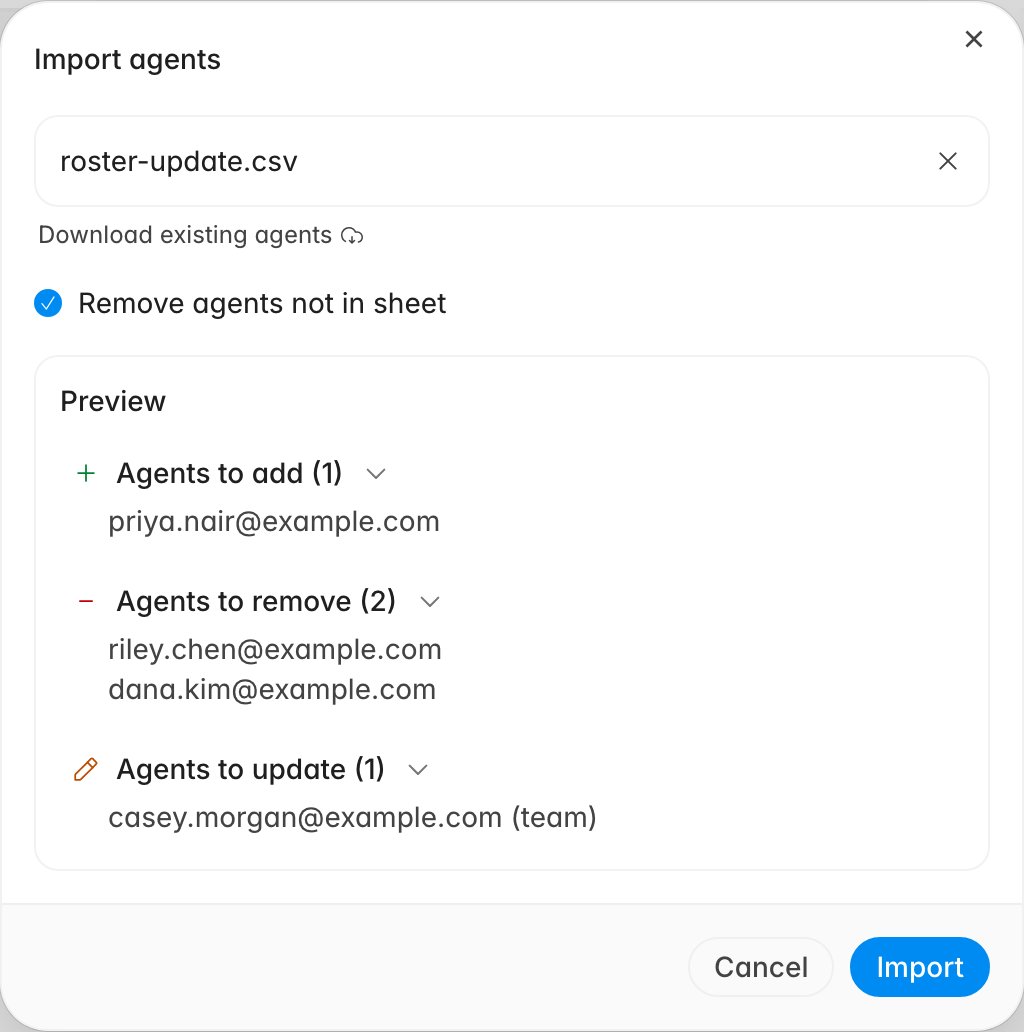
  4. If you selected it, read the Preview that appears. It groups pending changes into Agents to add, Agents to remove, and Agents to update, with the changed fields named next to each updated agent.
  5. Click Import.
Import agents dialog after uploading a CSV with Remove agents not in sheet selected, showing the Preview grouped into add, remove, and update What each column does on the way in:
The Preview only appears with Remove agents not in sheet selected. A plain import shows no preview and adds or updates the supplied rows without removing anyone.
Imports are all or nothing. If any row fails validation (a malformed email, or an employee ID already used by someone else), Rulebase rolls the whole file back and lists the failures as Row 4: … in the dialog. Fix those rows and upload again.

Add one or two agents without a CSV

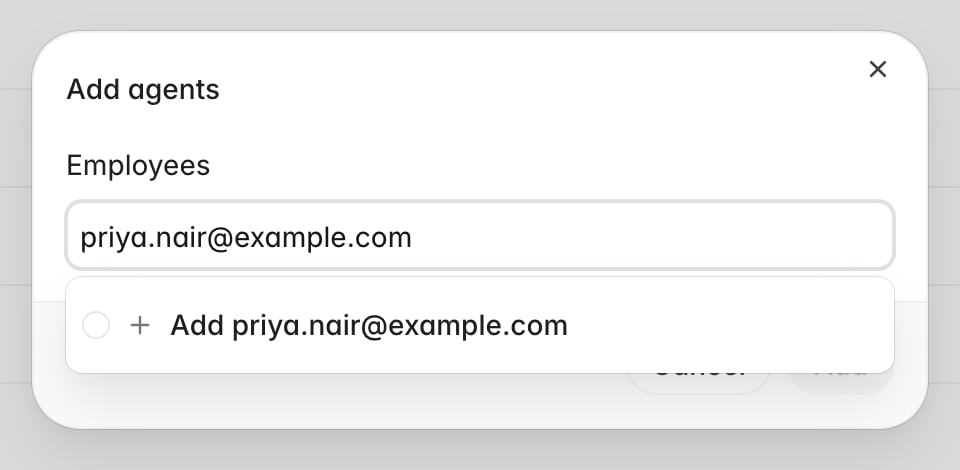
For a single new hire, Add beats editing a spreadsheet. The Employees field searches people already in Rulebase who are not on the roster, including anyone who arrived through a ticket integration but was never added for QA. If nobody matches, type a full email address and the dropdown offers Add with that address, creating the agent outright. Add agents dialog with an email typed into the Employees field and an Add option offering to create that address as a new agent Select as many people as you need, then click Add. To fill in a name, team, or custom field afterwards, click the agent’s row to open Edit agent.
Move agents between teams

  1. Hover a row and click its checkbox, then select the rest. Hold Shift for a range.
  2. Click Change team in the floating action bar.
  3. Search for the destination team and select it.
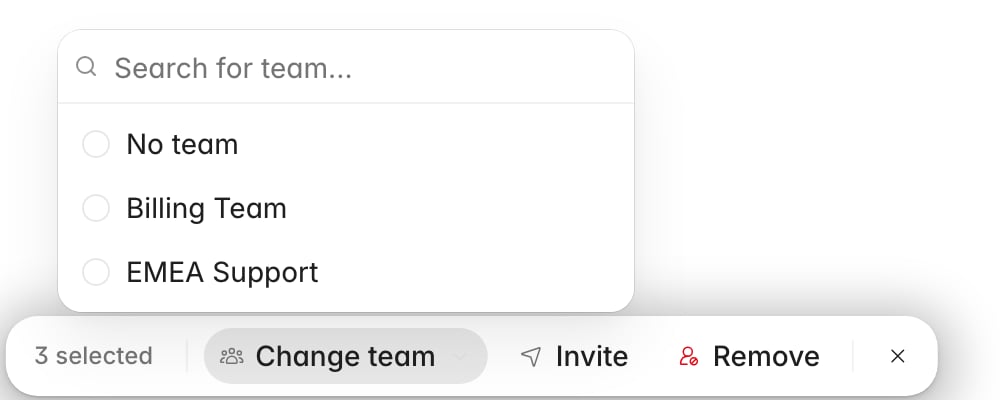
Agents table floating action bar showing 3 selected with Change team, Invite, and Remove actions, and the team search popover open Every selected agent moves at once. An agent belongs to one team at a time, so this replaces their current team; No team clears the assignment. The bar also holds Invite, which sends a login invitation to selected agents still marked Not invited.

Remove agents from the roster

  1. Select the agents to remove.
  2. Click Remove in the floating action bar.
  3. Read the confirmation, then click Remove agents.
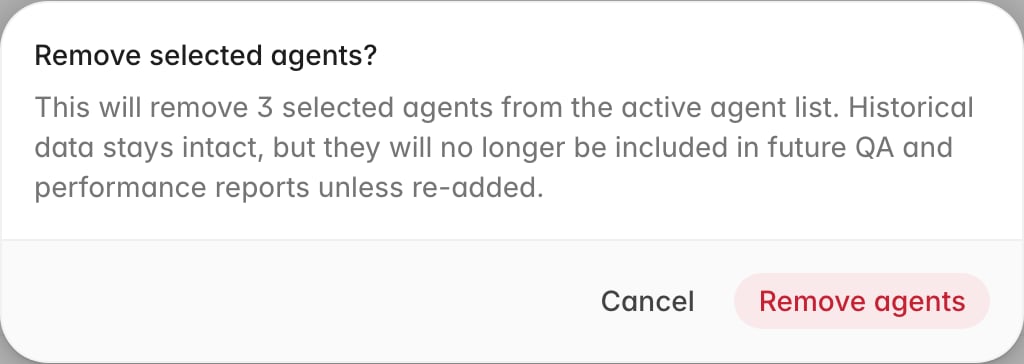
Remove selected agents confirmation dialog explaining that historical data stays intact and removed agents will not appear in future reports Removal takes people off the active roster; nothing is deleted. Past evaluations, scores, and report history stay put. Going forward, they stop being picked up for new QA evaluations and drop out of performance reports. For a single person, the row’s overflow menu has Remove agent. If someone returns, add them back with Add or in your next import; they rejoin with their old history intact.

Confirm the roster is right

After a bulk change:
  • The agent count matches the number of people you expect to be evaluated.
  • Nobody sits on - in the Team column unless you meant them to.
  • Filtering by each team returns the people their lead would expect.
Performance views read from this roster. A team page shows only the agents the roster puts on that team. In Use team and agent performance, a name missing there is almost always a name missing here. If a specific person’s evaluations still look wrong, the cause is usually a second record under a different email. Open the overflow menu on their row and use Merge to combine the two.