Calibrations are switched on under
Settings > Features, in the
Quality assurance group. If you cannot find them, that toggle is off, or
quality assurance itself is. Open calibrations from Home > Tasks or from a
direct link.
Before you start
- Have a published scorecard, and tickets already evaluated in the period you want to sample. Sampling draws on tickets evaluated inside the span you choose, not tickets merely created in it. A quiet fortnight of QA yields a thin sample.
- Line up at least two reviewers who are members of the organization. One reviewer is legitimate for spot-checking your AI, but reviewer-to-reviewer agreement needs two.
- Decide the question first. “Are we consistent on refunds?” leads to a very different sample from “is our scoring too harsh at the bottom of the range?”
Build the sample
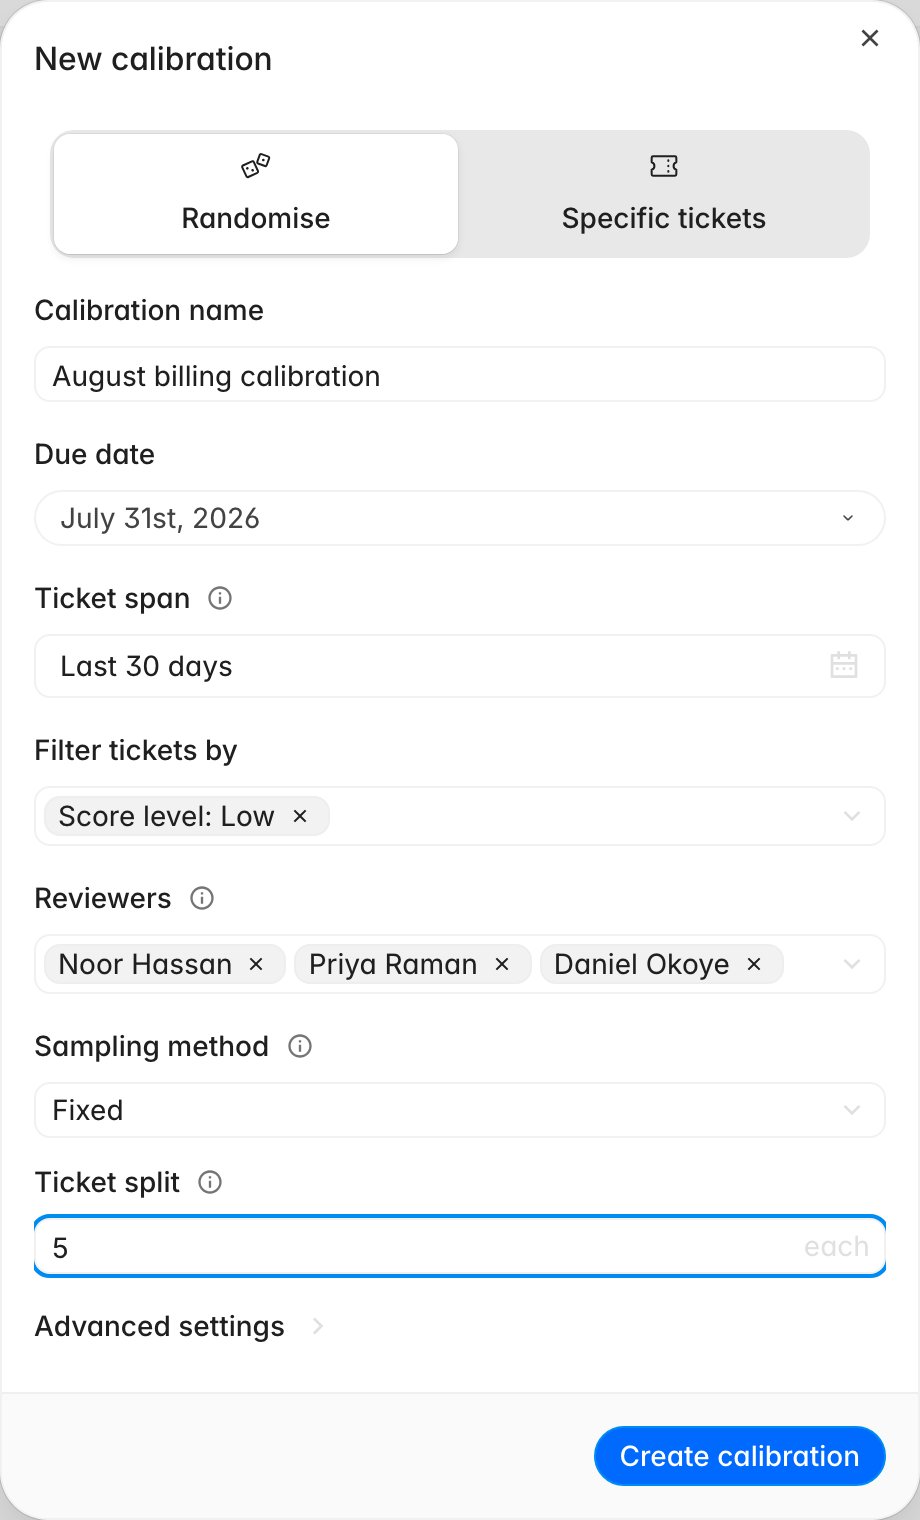
- Go to Home > Tasks and find the Calibrations card. Click the + button in its header, or use New > Calibration in the tasks list.
- If your organization evaluates back-office work, you are asked what to calibrate first: Tickets or Work items. Pick one and continue. When work item QA is off, the question is skipped.
- Choose how the tickets are chosen. Randomise samples from a filtered pool; Specific tickets lets you name ticket IDs yourself, which is the right choice when you want everyone arguing about the same known-hard cases.
- Name it. Leave it blank and you get today’s date plus “Calibration”, which is fine for a recurring session and useless in a list of twenty.
- Set the Due date. It defaults to a week out and it is what reviewers are chased against.
- Set the Ticket span, the date range the sample is drawn from.
- Under Filter tickets by, narrow the pool by team, channel, or Agent QA score level, and by brand if your help desk has brands. Sampling only Low-band tickets asks whether your reviewers agree about failure, which is where rubrics usually diverge.
- Add your Reviewers. Everyone you add gets their own assignments.
- Choose the sampling method. Fixed takes a Ticket split, the number of tickets given to each reviewer. Percentage takes a share of the eligible pool instead.
- Click Create calibration.
What reviewers do
Reviewers reach their work from Home > Tasks, or from Start review on the calibration itself. Each ticket opens the normal evaluation workspace with a counter (“3 of 8 tickets”) and their own completion percentage in the header. They score the scorecard as usual, click Submit evaluation, and move to the next one with the navigation arrows. Nothing about the calibration changes how an evaluation is produced. Each reviewer’s submission is a real manual evaluation on that ticket: Perform a manual evaluation covers the scoring itself, and calibration scores show up in reporting like any other manual score.Read the results
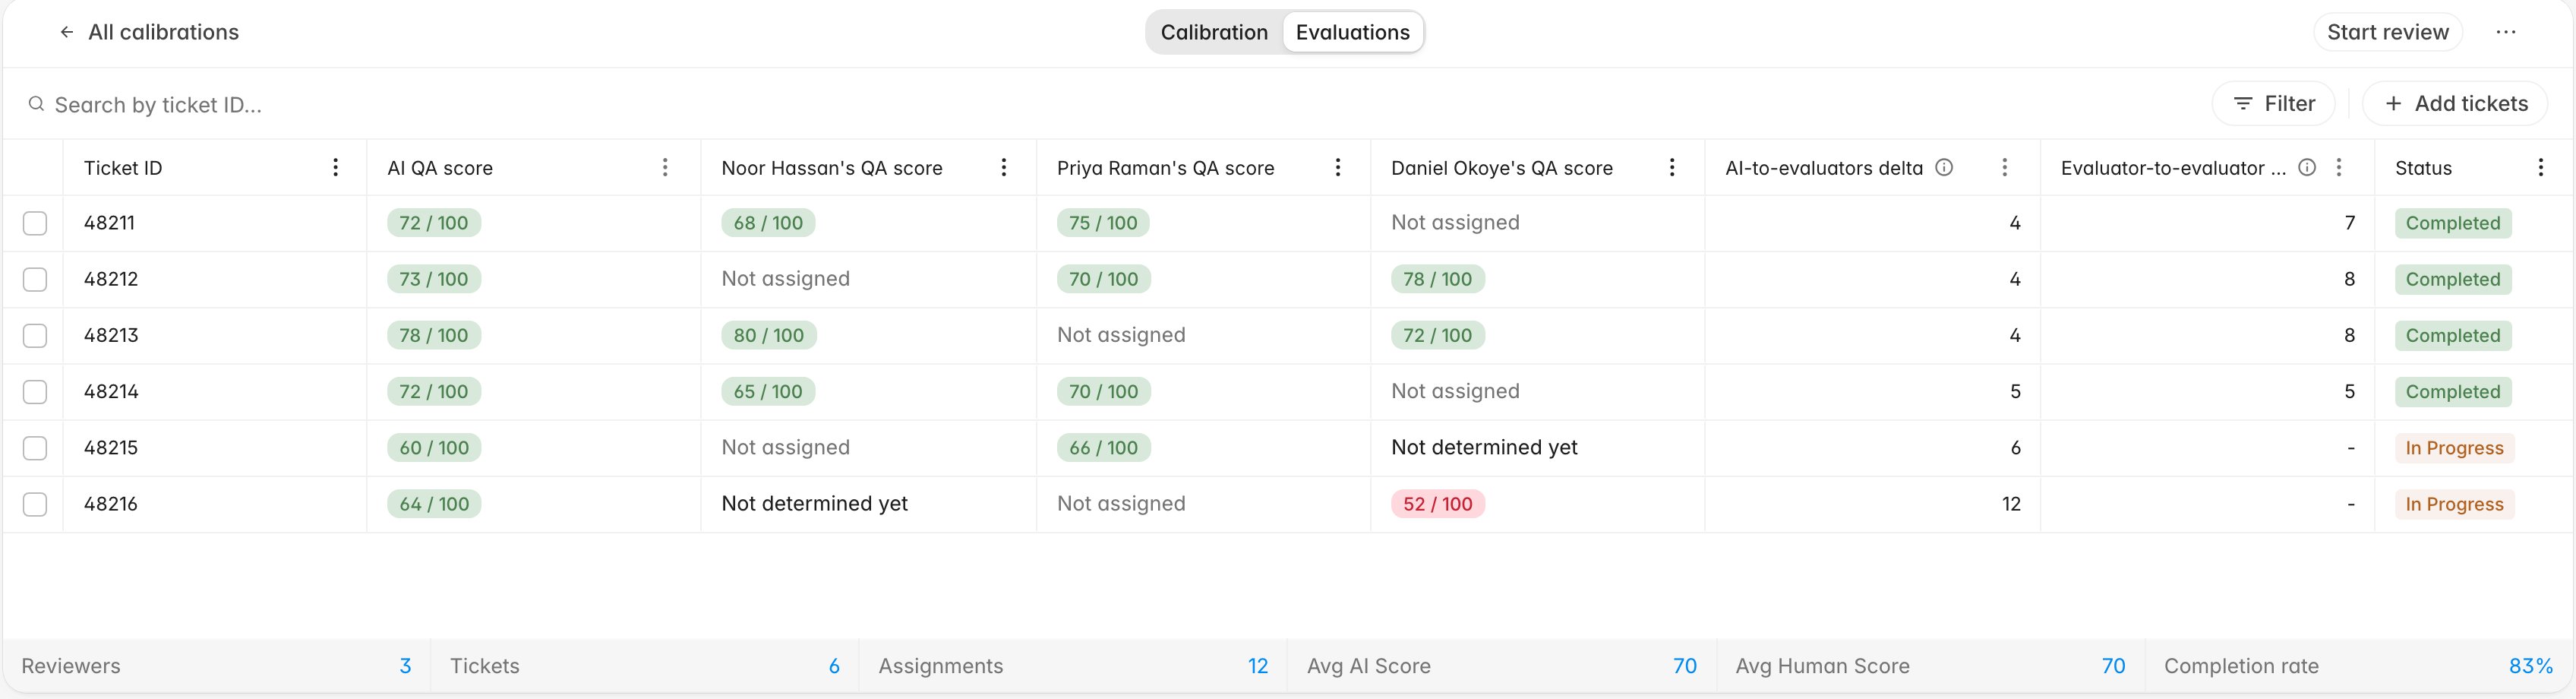
Open the calibration and you land on the Calibration tab: the assignment count, the span, an overall percentage complete, the filters you chose echoed back, and a card per reviewer with their own progress. Chase from here: a calibration where one reviewer has done nothing produces no reviewer-to-reviewer numbers at all.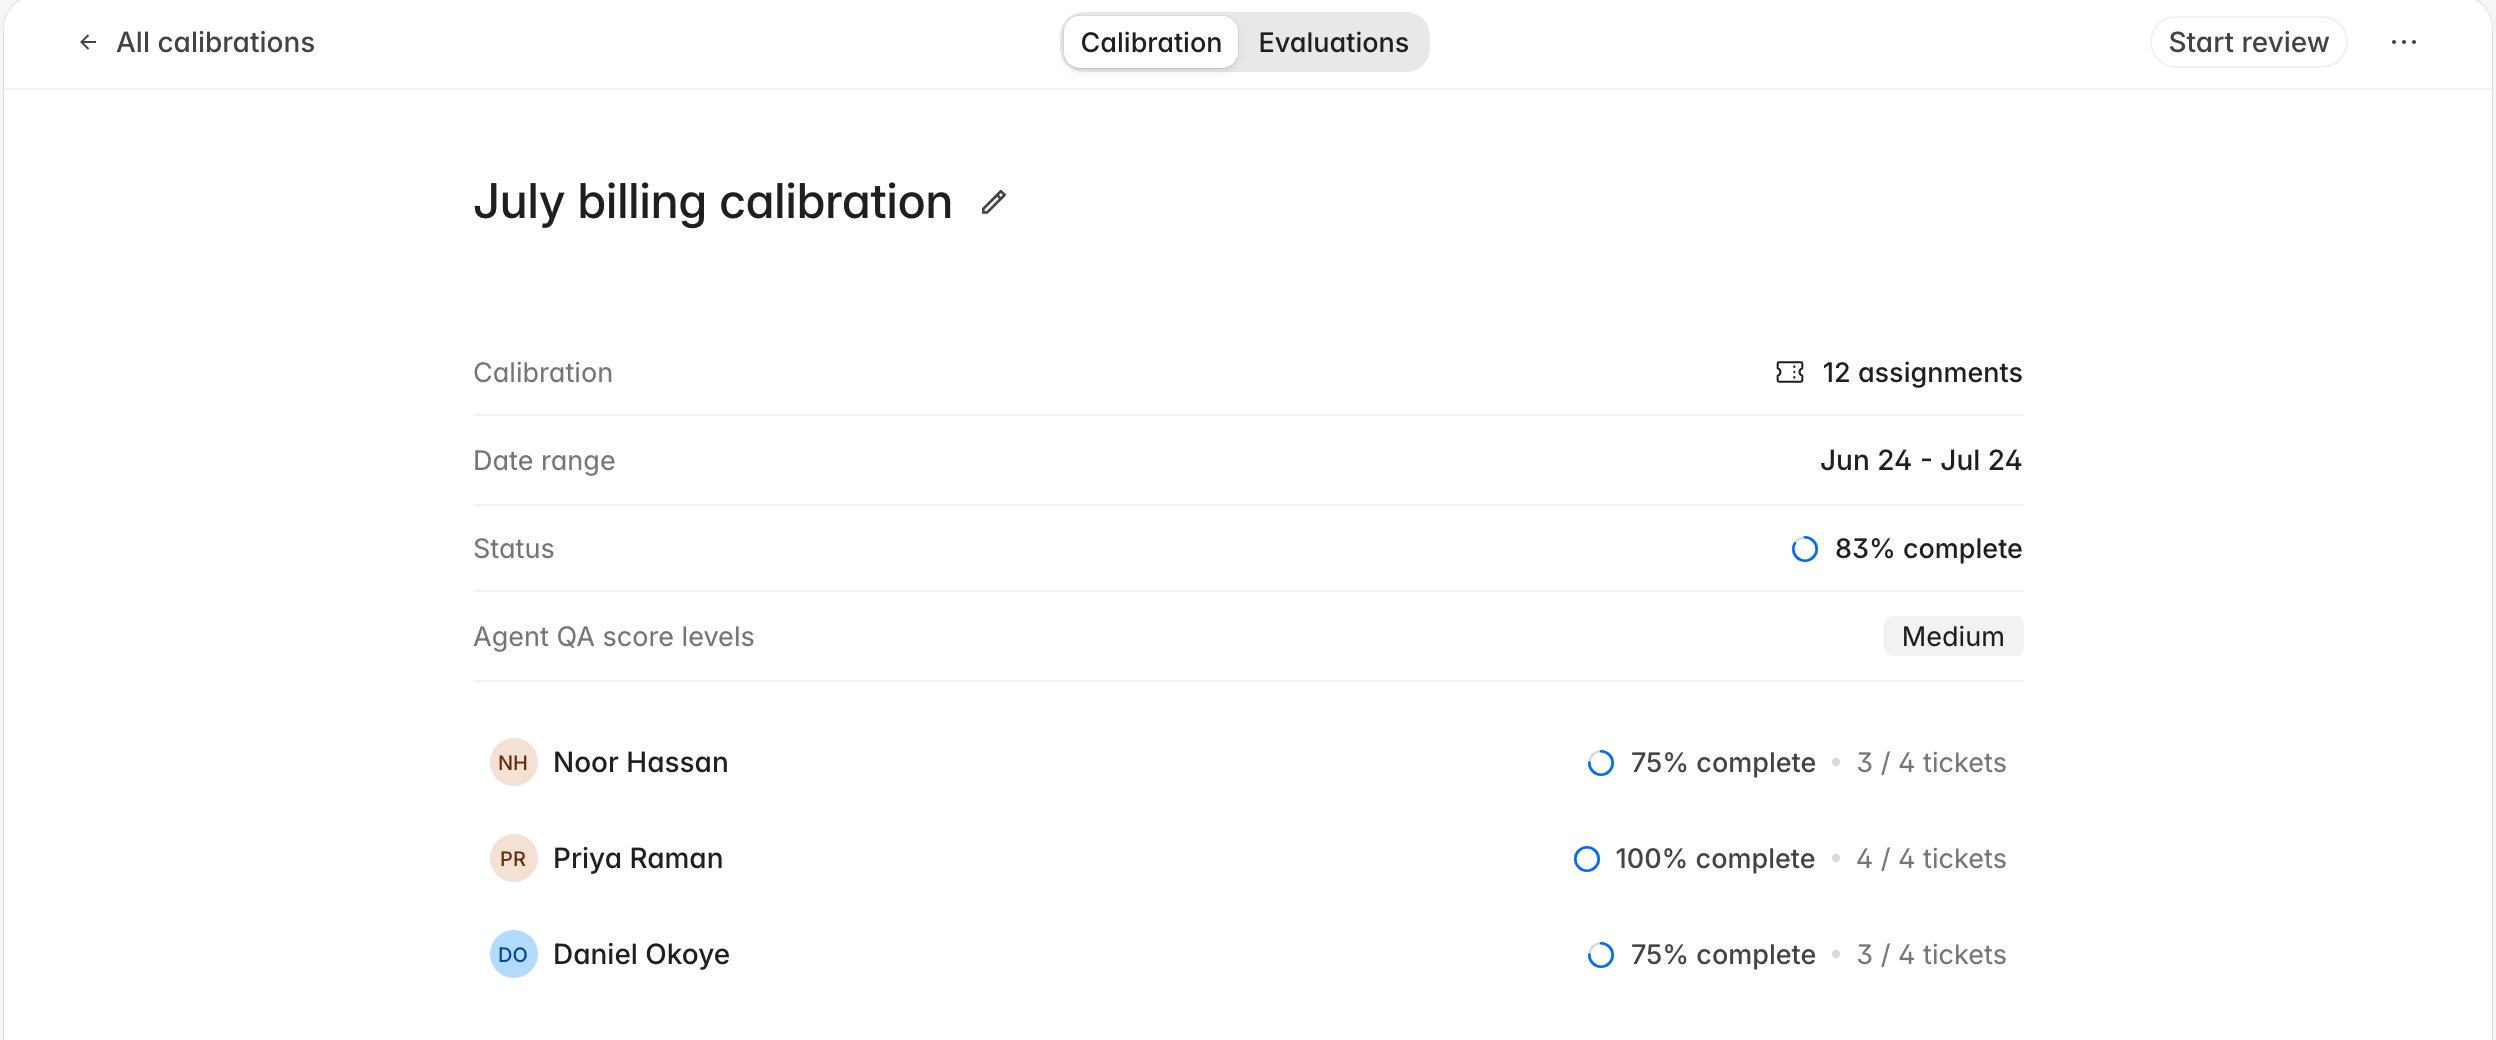
- AI QA score — what automatic QA said.
- A column per reviewer, holding that person’s score for the ticket.
- AI-to-evaluators delta — the average absolute gap between the AI score and each human score. Lower is closer agreement.
- Evaluator-to-evaluator delta — the average absolute gap between every pair of human scores. This column only appears once two or more reviewers have work in the calibration.
- Status — whether that ticket’s reviews are done.