
A testing program is the standing definition of one piece of monitoring: which records it examines and which control questions it asks of each. Each cycle of that program is a test, holding a sheet of sampled records with one column per question. Finish the definition before anyone draws a sample, so cycles stay comparable across the year. Compliance > Testing showing a monthly UDAAP testing program in the programs list
Programs live under Compliance > Testing. Parts of the flow say test where they mean program: the create page is headed Create a test and the setup wizard reads Set up test. You are building a program in both. Individual tests come after the program is confirmed.

Before you start

  • Compliance must be enabled for your organization (Settings > Features). If Compliance is missing from the sidebar, ask an administrator to switch it on.
  • The records you intend to test need to be reaching Rulebase already: tickets and sales calls from your help desk, or cases and alerts from a monitoring tool such as Unit21.
  • Have your control language to hand. Rulebase drafts controls and questions, but the wording that ends up in the program is what your testing will be judged against, so edit it before you accept it.

How programs, tests, and samples relate

  • Program: the reusable definition. Record type, controls, test scripts, population and sampling rules, frequency.
  • Test: one cycle of that program, bounded by a start and end date, holding a sheet and its own analysis.
  • Sample: the rows inside a test’s sheet, the specific records drawn for that period.
Drawing the sample is covered in Populate a compliance test, and reading the result in Run and analyze a compliance test.

Create the program

  1. Go to Compliance > Testing.
  2. Click New.
  3. Either describe the program in Describe what you would like to test and submit it (optionally attaching a policy or procedure with Upload), or click a framework card under or select from a program. Each card shows how many control modules it brings.
  4. Rulebase creates the program and opens the setup wizard on the Details step.
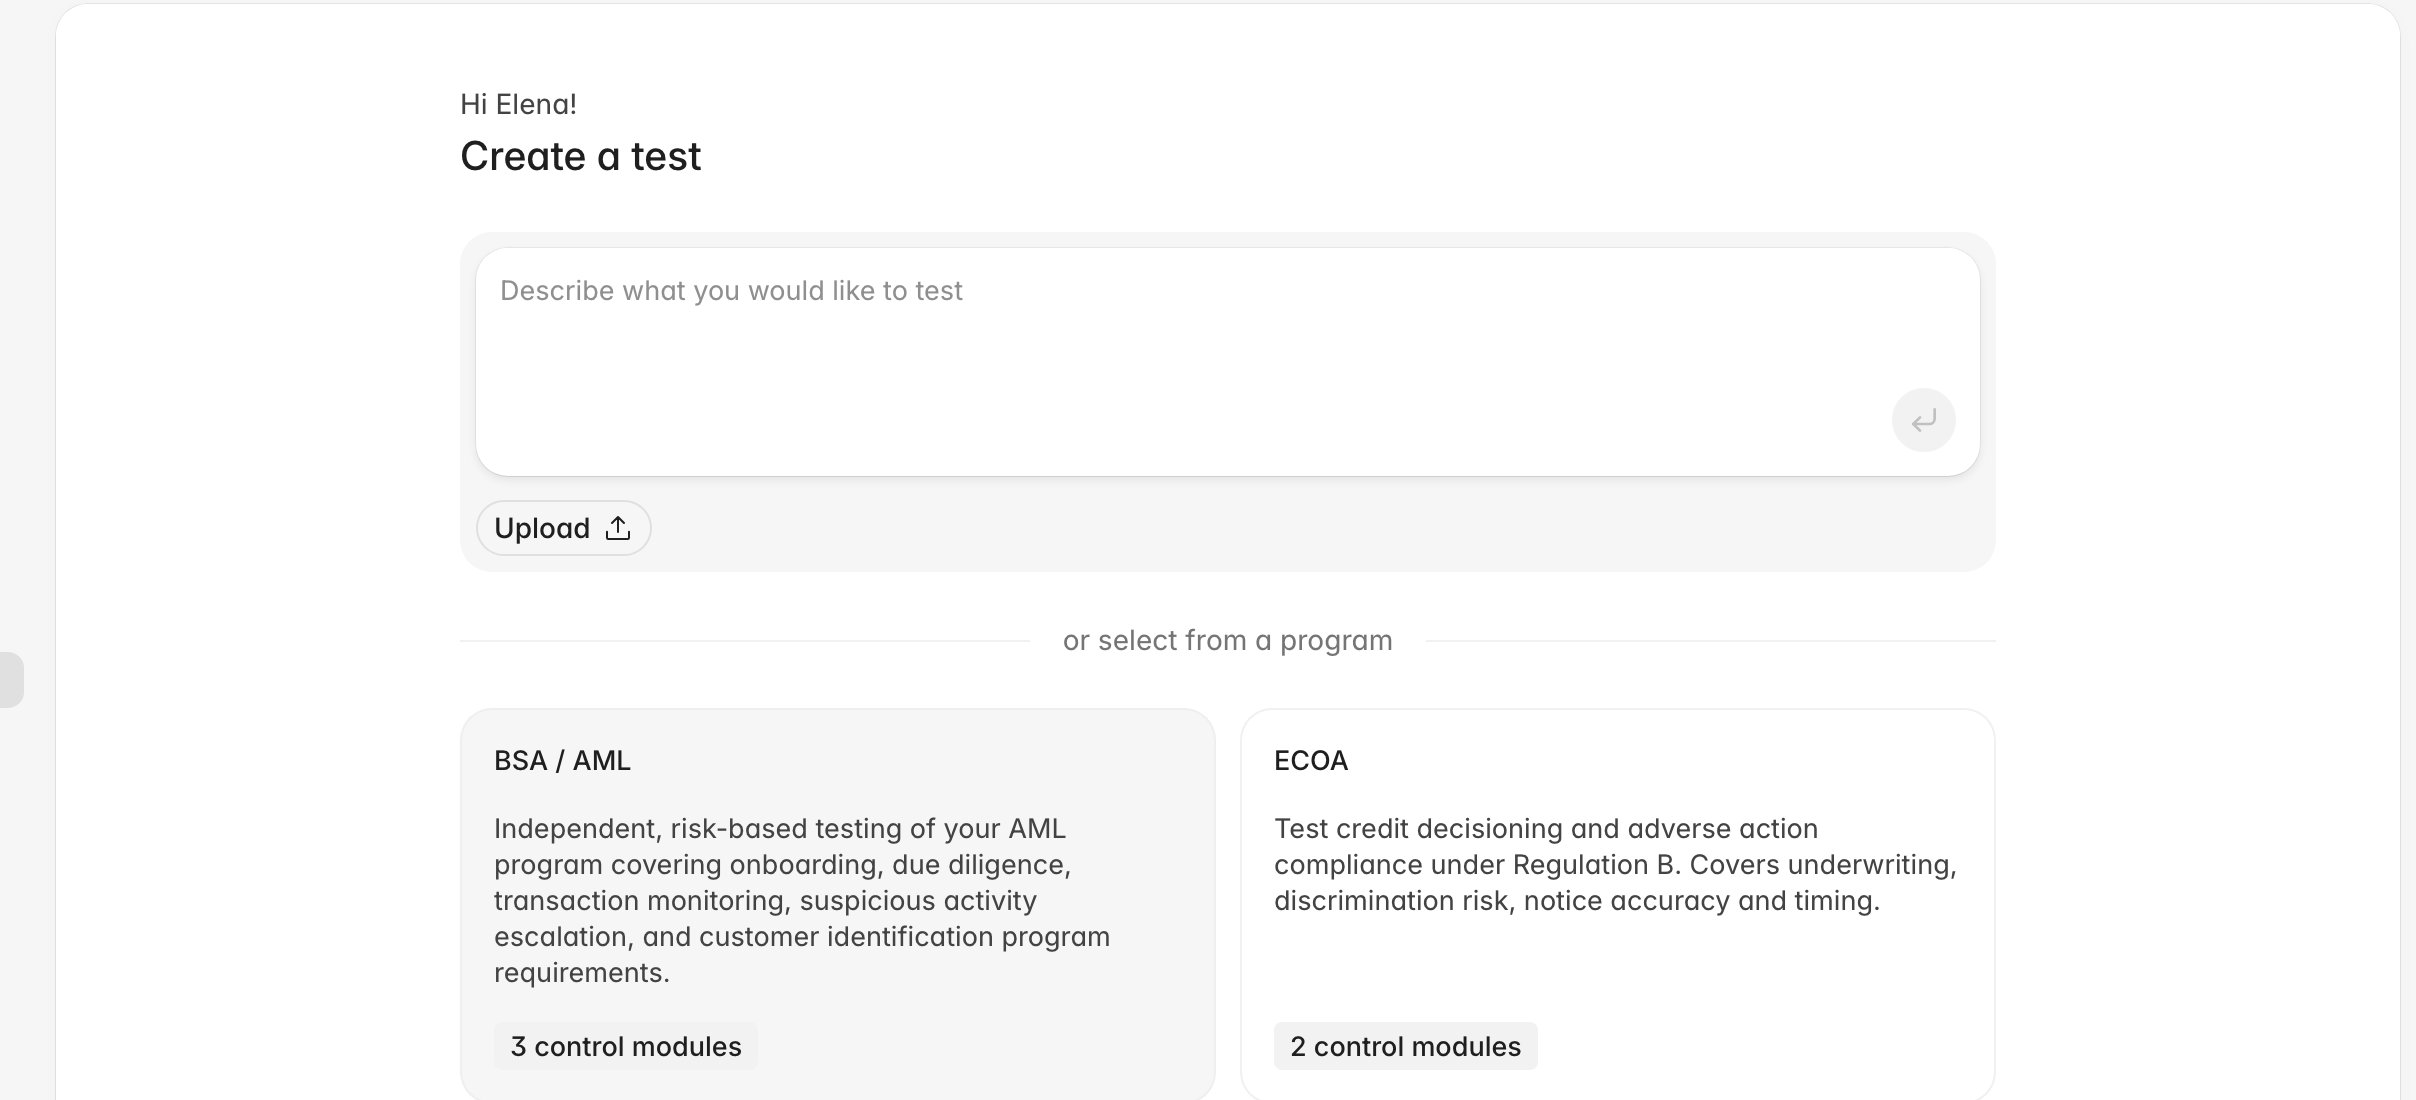
Create a testing program page with a prompt box and framework cards showing their control module counts Both routes land in the same wizard with the same three steps: Details, Population, and Risk factors. The framework route pre-selects a control library instead of inferring one from your description.

Confirm the details

The Details step fixes the program’s scope:
  • Test name: the program name, and the name that appears on every test and report it produces.
  • Description: what the program covers. Rulebase uses it as context when it fills a test.
  • Applies to: the record type the program examines: Interactions, Disputes, Cases, or Alerts. It decides which filters the Populate test dialog offers and which columns a new test sheet is built with, so settle it before you sample: sheets that already exist keep the columns they were created with.
  • Frequency: Weekly, Monthly, or Quarterly. It sets the default period for each new test.
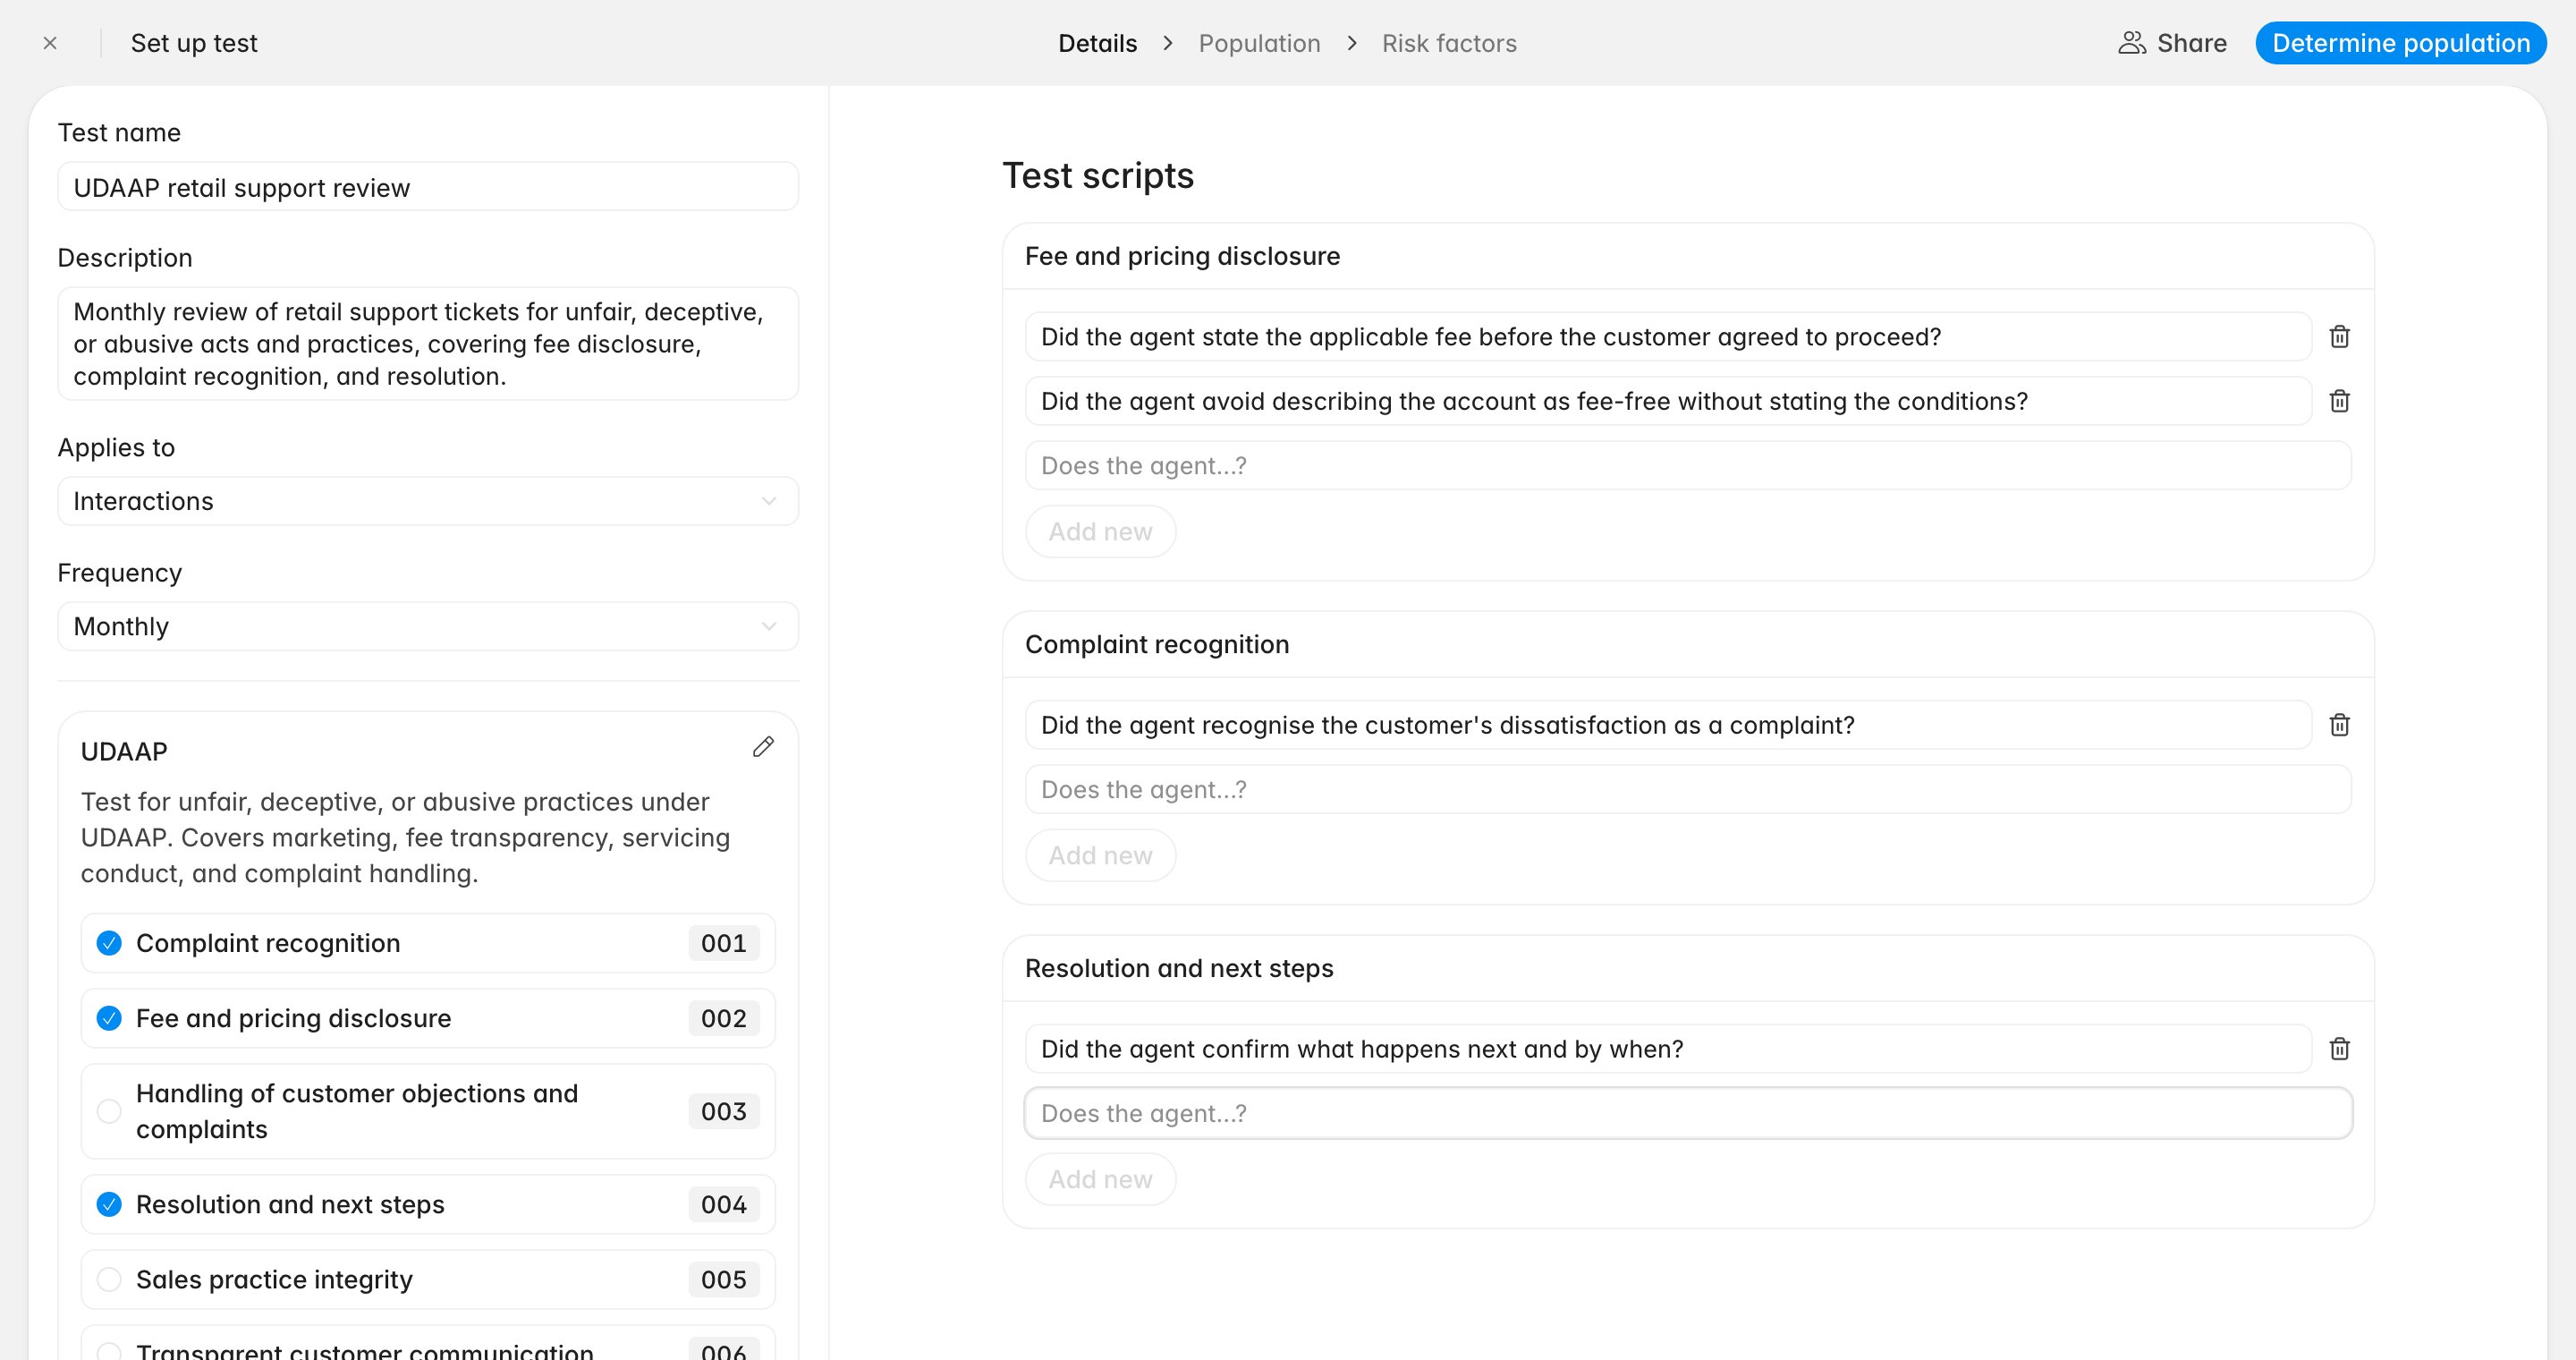
Underneath, the control library shows every control in the framework with a checkbox. Checked controls are in the program, and each holds its test scripts on the right: the questions Rulebase answers for each sampled record. Add a question in the Does the agent…? field and click Add new; write them as questions with a defensible yes, because the analysis counts answers per question. Program setup Details step with test name, applies to, frequency, the UDAAP control list, and test scripts per control Uncheck a control to take it out of this program. The pencil beside the framework name switches the list into editing mode, where you can rename a control or delete it with the bin icon. A deletion there removes the control from your whole organization, across every program, without asking twice. Unchecking is what you want in almost every case. When the details are right, click Determine population. The button stays disabled while a draft question is pending, so finish or discard any half-written one first.

Define how the population is sampled

This step records what the program covers and how much you intend to test; the wording becomes part of your audit record.
  1. Click Add test population.
  2. Give the population a Population name, such as Retail support tickets.
  3. Under Determine test population, choose Natural language and describe the population, or choose Determine via attributes and set a condition on a field such as Interaction type or Channel. The attributes option appears for the record types that support it, and the panel takes one condition.
  4. Save the population, then set Sample size as a percentage of it. Check Test the full population. instead when the program is a census of every record.
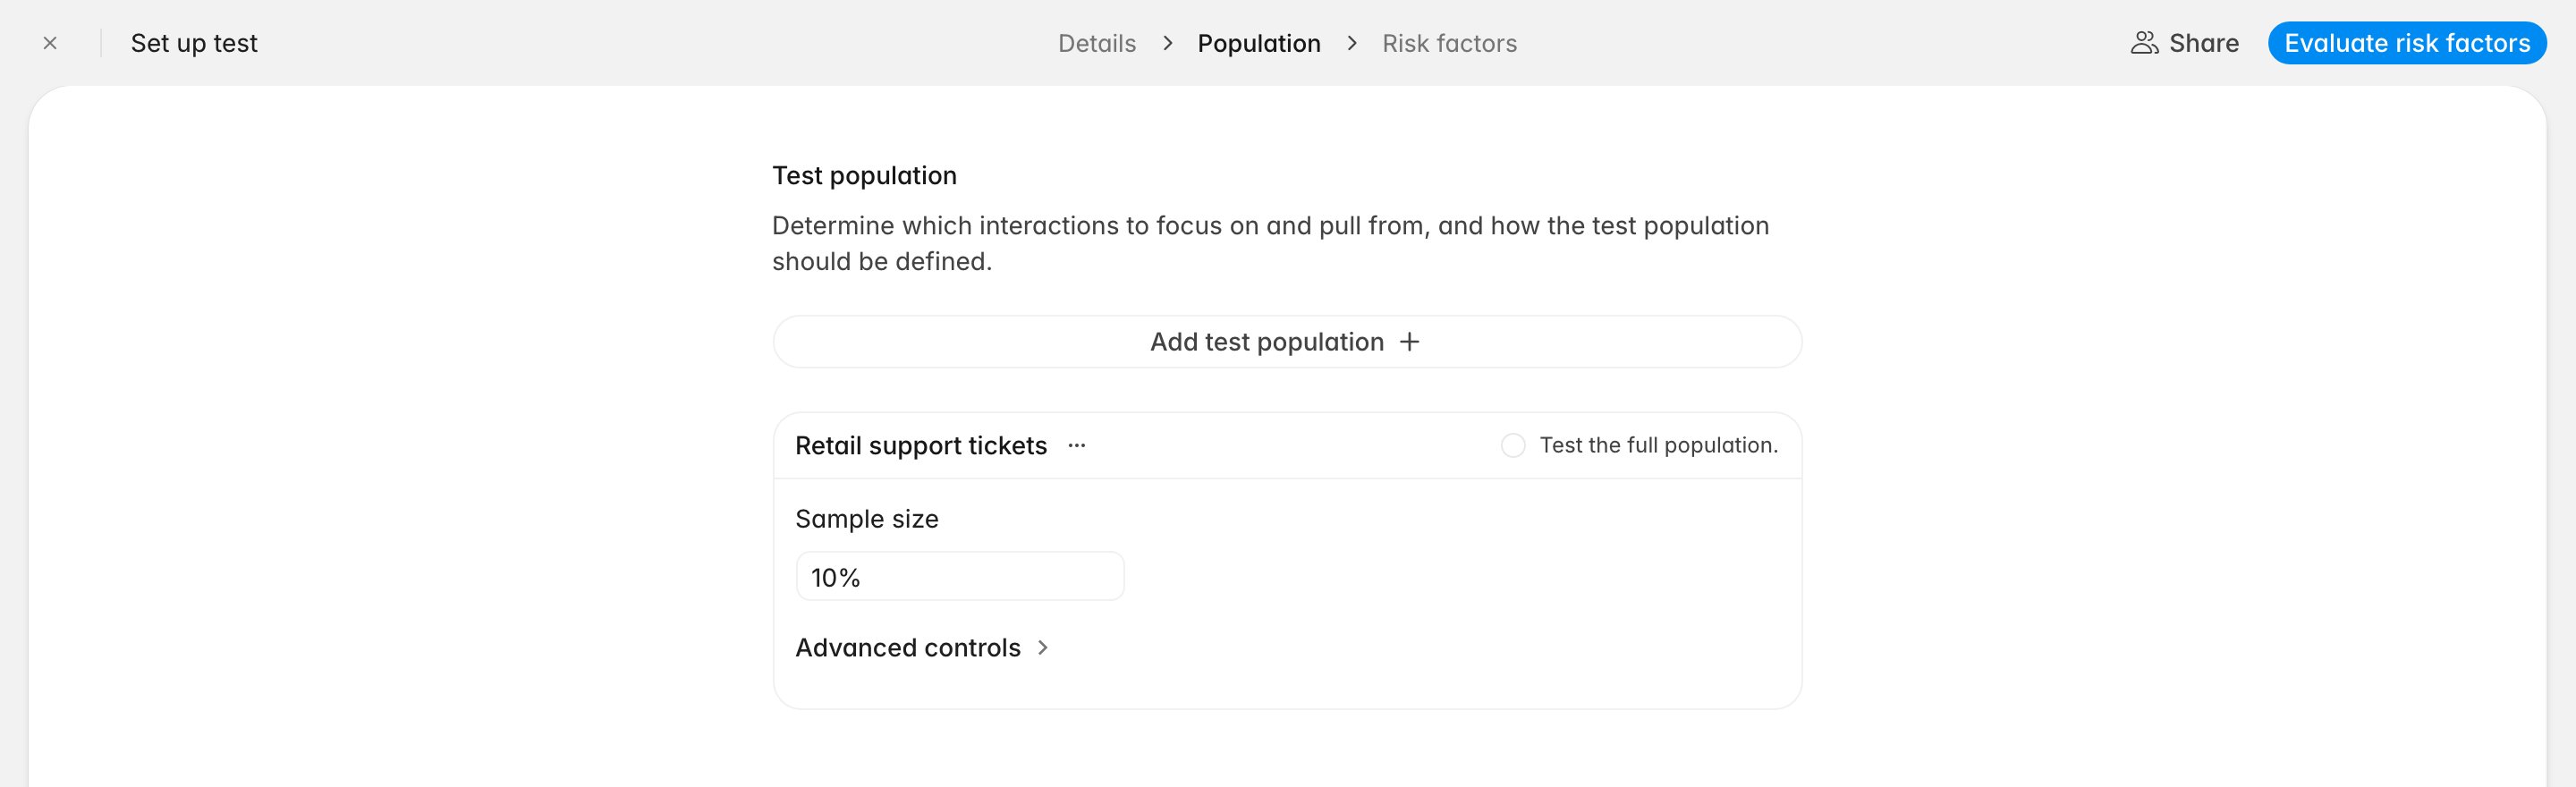
Population step of program setup with a named test population and a 10% sample size Where coverage should scale with volume, open Advanced controls and turn on Define tiered sampling rules and sample size. Each tier takes a Population size band and its own Sample size, as a percentage (%) or a fixed count (items); Add tier adds the next band. Rulebase passes these rules to the AI as program context when it fills a test sheet, and they stand as the program’s documented methodology. They do not prefill the Populate test dialog: you still choose the filters and sample size when drawing each sample. Click Evaluate risk factors to continue. At least one population is required.

Review the risk factors

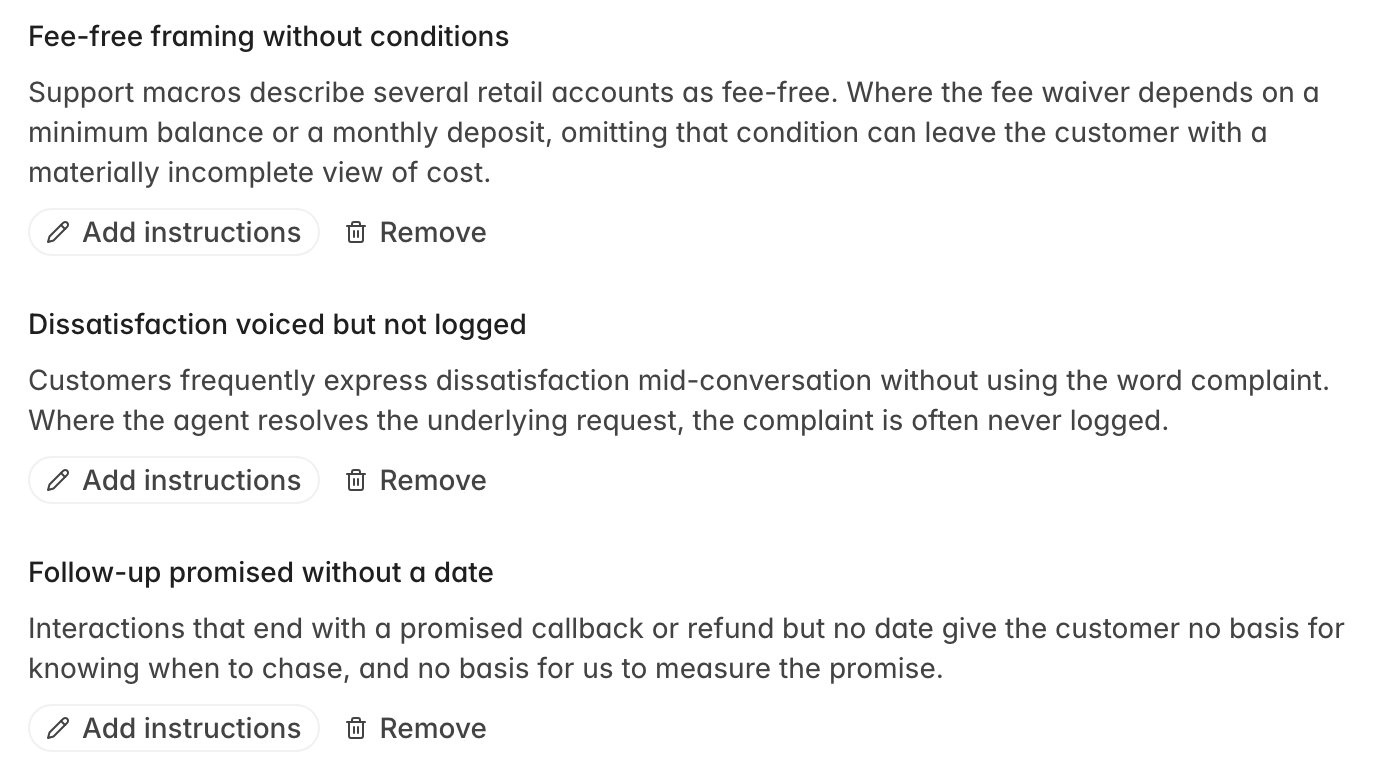
Rulebase reads what it already knows about your interactions and drafts the failure patterns worth watching: a fee described without its condition, dissatisfaction acknowledged but never logged. Each factor has a title and a short explanation. Use Add instructions to add your own guidance to one, Remove to drop it, and Add risk factor to write one Rulebase missed. Risk factors step showing drafted risk factors with Add instructions and Remove actions Treat this step as a review of your own thinking. Risk factors are recorded on the program; they are not fed into cell filling or the analysis report, so anything you actually want tested has to exist as a test script on the Details step. Confirm risk factors finishes setup and opens the program.
Add the tests

A confirmed program has no tests until you create them; a test holds a period’s sample.
  1. On the program, click New test.
  2. Set the Period. It defaults to the current period for the program’s frequency.
  3. Click Create test.
Rulebase names the test after its period (a full calendar month becomes June 2026 test) and opens it on an empty sheet. New test dialog with a June 2026 period and the Create test button Program page listing the July and June tests with their periods and authors
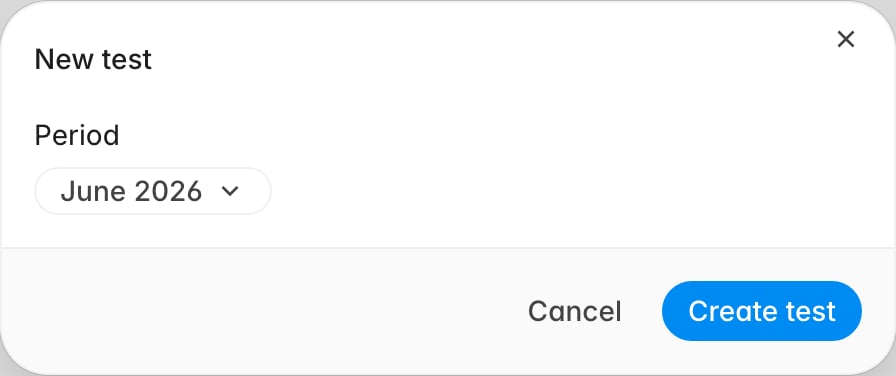
Create each test when you are ready to sample it. The period you choose is the window the sample is drawn from, so a test created for the wrong month quietly produces the wrong population.
Next, Populate a compliance test draws the sample into this sheet.

Change a program later

The menu beside the program name offers Edit, which reopens the setup wizard with your confirmations intact, and Delete, which removes the program along with its tests. Editing a program does not change tests that have already run: their sheets keep their columns, so a mid-year change to the test scripts shows up in the next test and leaves the last one as it was. Each test row has its own menu with Rename and Delete. Renaming is cosmetic. The period controls what a test covers, regardless of the name.
